Add a GraphQL API backend
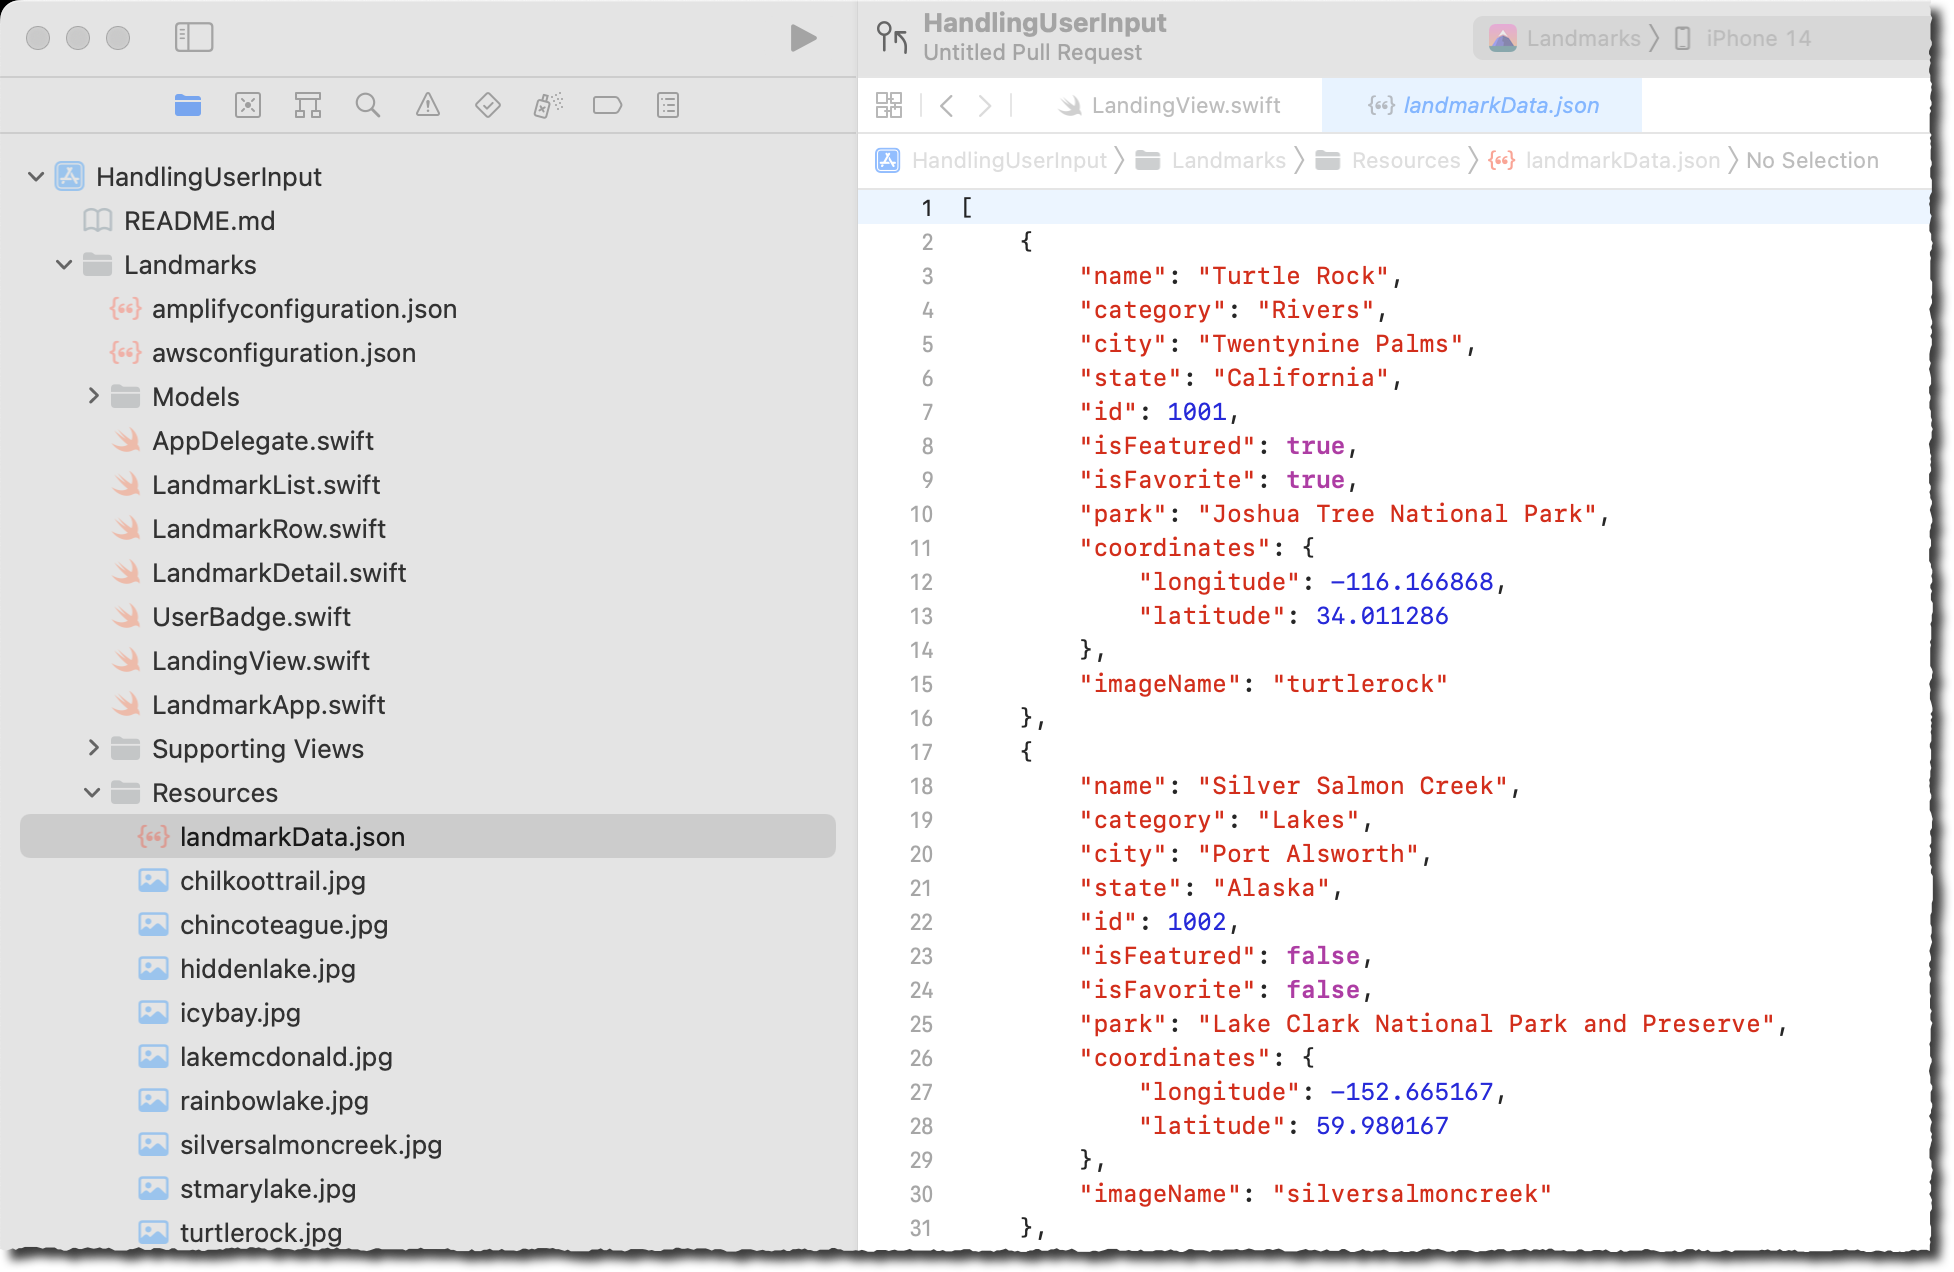
Now that we have authenticated users, let’s make an API for retrieving Landmarks. The application we started from uses a locally bundled JSON file to list all Landmarks. You can check that file in Landmarks/Resources/landmarkData.json. We are going to create a database in the cloud to store this list and an API to allow our application to retrieve the list.
To build our API we’ll use AWS AppSync, a managed GraphQL service for building data-driven apps. If you’re not yet familiar with the basics of GraphQL, you should take a few minutes and check out https://graphql.github.io/learn/ before continuing, or use the site to refer back to when you have questions as you read along.
Declare an API backend
Just like we added an authentication backend in the previous section, we use amplify CLI to create a GraphQL API. Amplify will also create the database automatically.
In a Terminal, type:
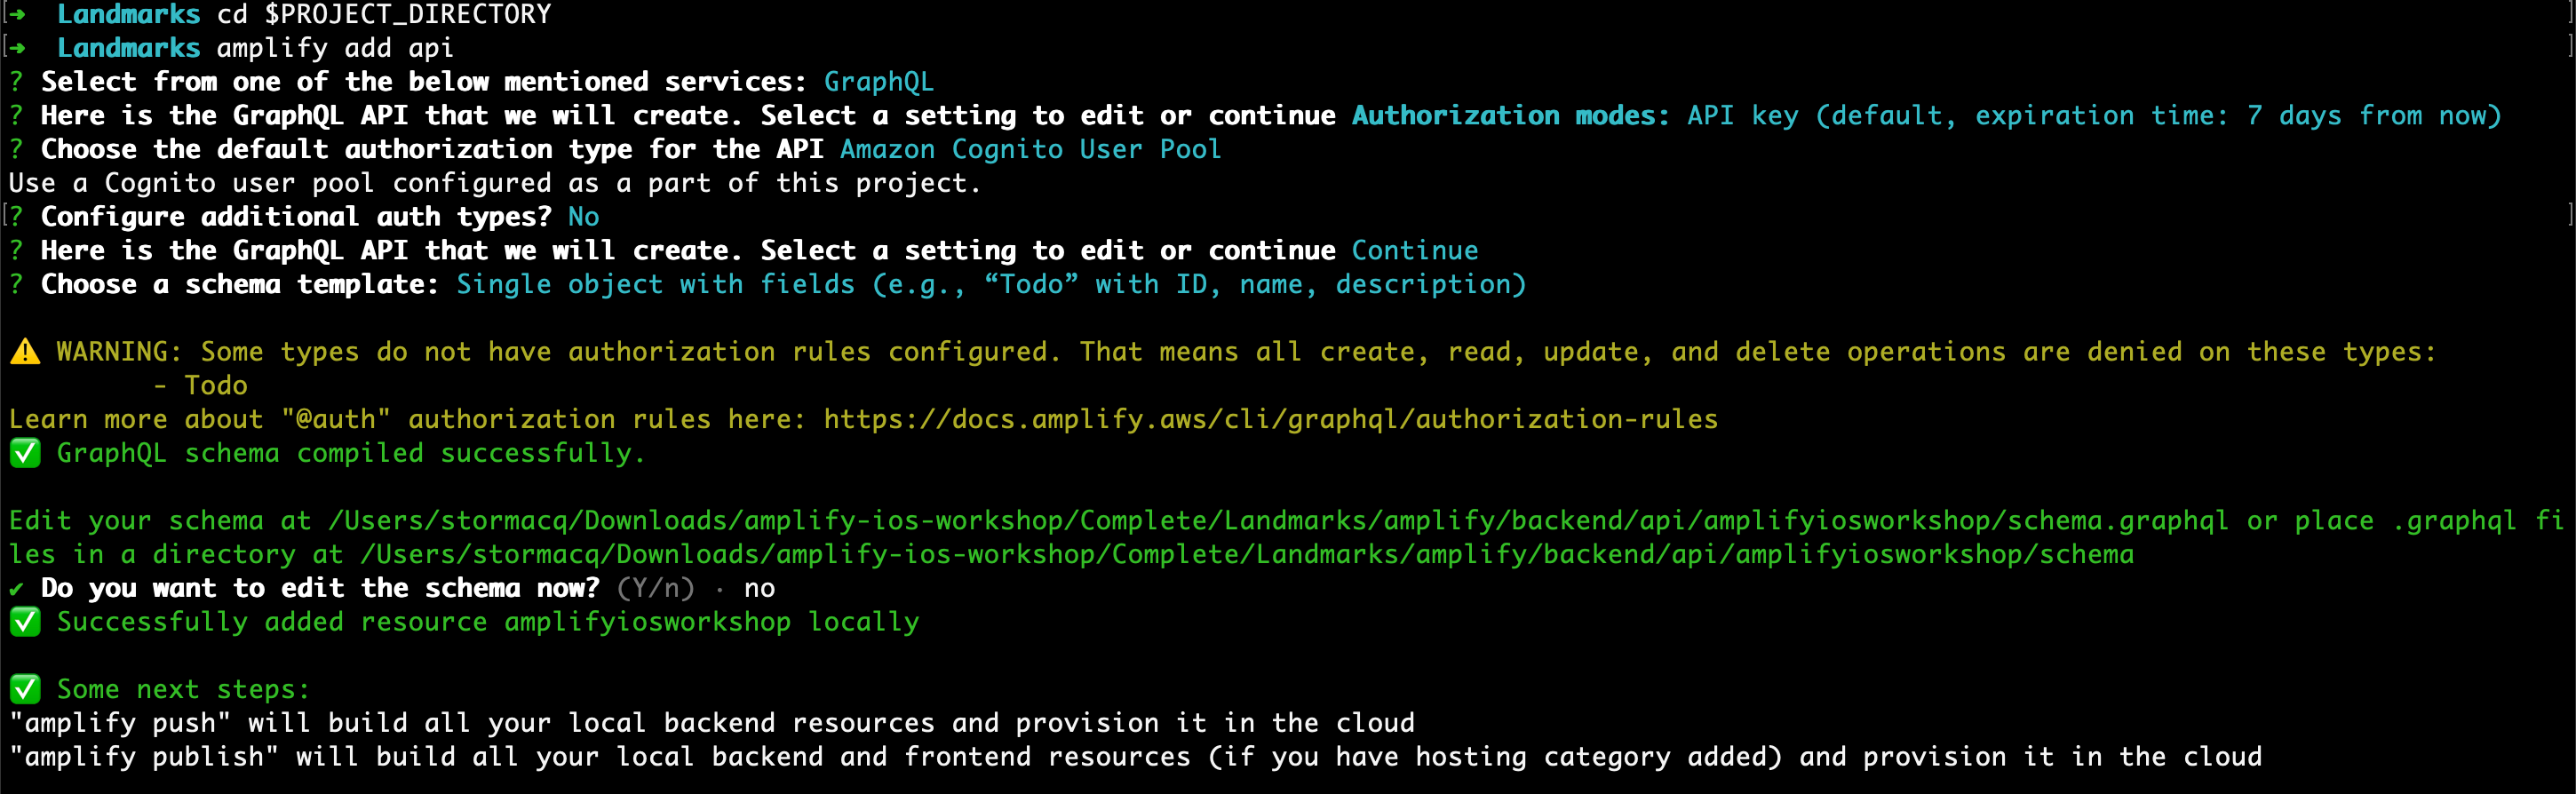
cd $PROJECT_DIRECTORY
amplify add api
-
Please select from one of the below mentioned services. Use the arrow keys to select GraphQL and press enter.
-
Use the arrow keys to select the current authentication mode Authorization modes: API key and press enter to change it.
-
Use the arrow keys to select Amazon Cognito User Pool and press enter.
-
Configure additional auth types? Accept the default (No) and press enter.
-
Review the proposed values, accept the default (Continue) and press enter.
-
Choose a schema template. Select any proposed schema, we are going to repace it in a next step. Press enter.
-
Do you want to edit the schema now? Enter No and press enter.
amplify creates the required resources to depoy your API in the cloud.
Let’s edit the GraphQL schema.
Declare the GraphQL Schema
Below is a schema that will suit our needs for storing and querying Landmarks.
- Copy the below schema to
$PROJECT_DIRECTORY/amplify/backend/api/amplifyiosworkshop/schema.graphql, replacing the example schema content. You can copy / paste the below command:
cd $PROJECT_DIRECTORY
echo "type LandmarkData
    @model
    @auth(rules: [
      { allow: private }
    ])
{
    id: ID!
    name: String!
    category: String
    city: String
    state: String
    isFeatured: Boolean
    isFavorite: Boolean
    park: String
    coordinates: CoordinateData
    imageName: String
}

type CoordinateData {
    longitude: Float
    latitude: Float
}" > $PROJECT_DIRECTORY/amplify/backend/api/amplifyiosworkshop/schema.graphql
There are a few things to notice about the schema:
-
@modelis a GraphQL Transformer. When this transformer is present, Amplify generates a database to store the data and to create Create, Read, Update, Delete and List (CRUDL) operations on this data. -
@authis another GraphQL Transformer used by Amplify. Theprivatekeyword tells Amplify to restrict API access to users authenticated with Amazon Cognito User Pools only and to authorize operations for any authenticated users. You can learn more about authorizations rules in the Amplify CLI documentation. -
the data schema itself is aligned to the JSON provided in the sample application (in Landmarks/Resources/landmarkData.json):
Create the API backend in the cloud
In a Terminal, assuming you are still in your project directory, type:
amplify push
-
Are you sure you want to continue? Review the table and verify an API is being Created. Accept the default (Yes) and press enter.
-
Do you want to generate code for your newly created GraphQL API? Select No and press enter.
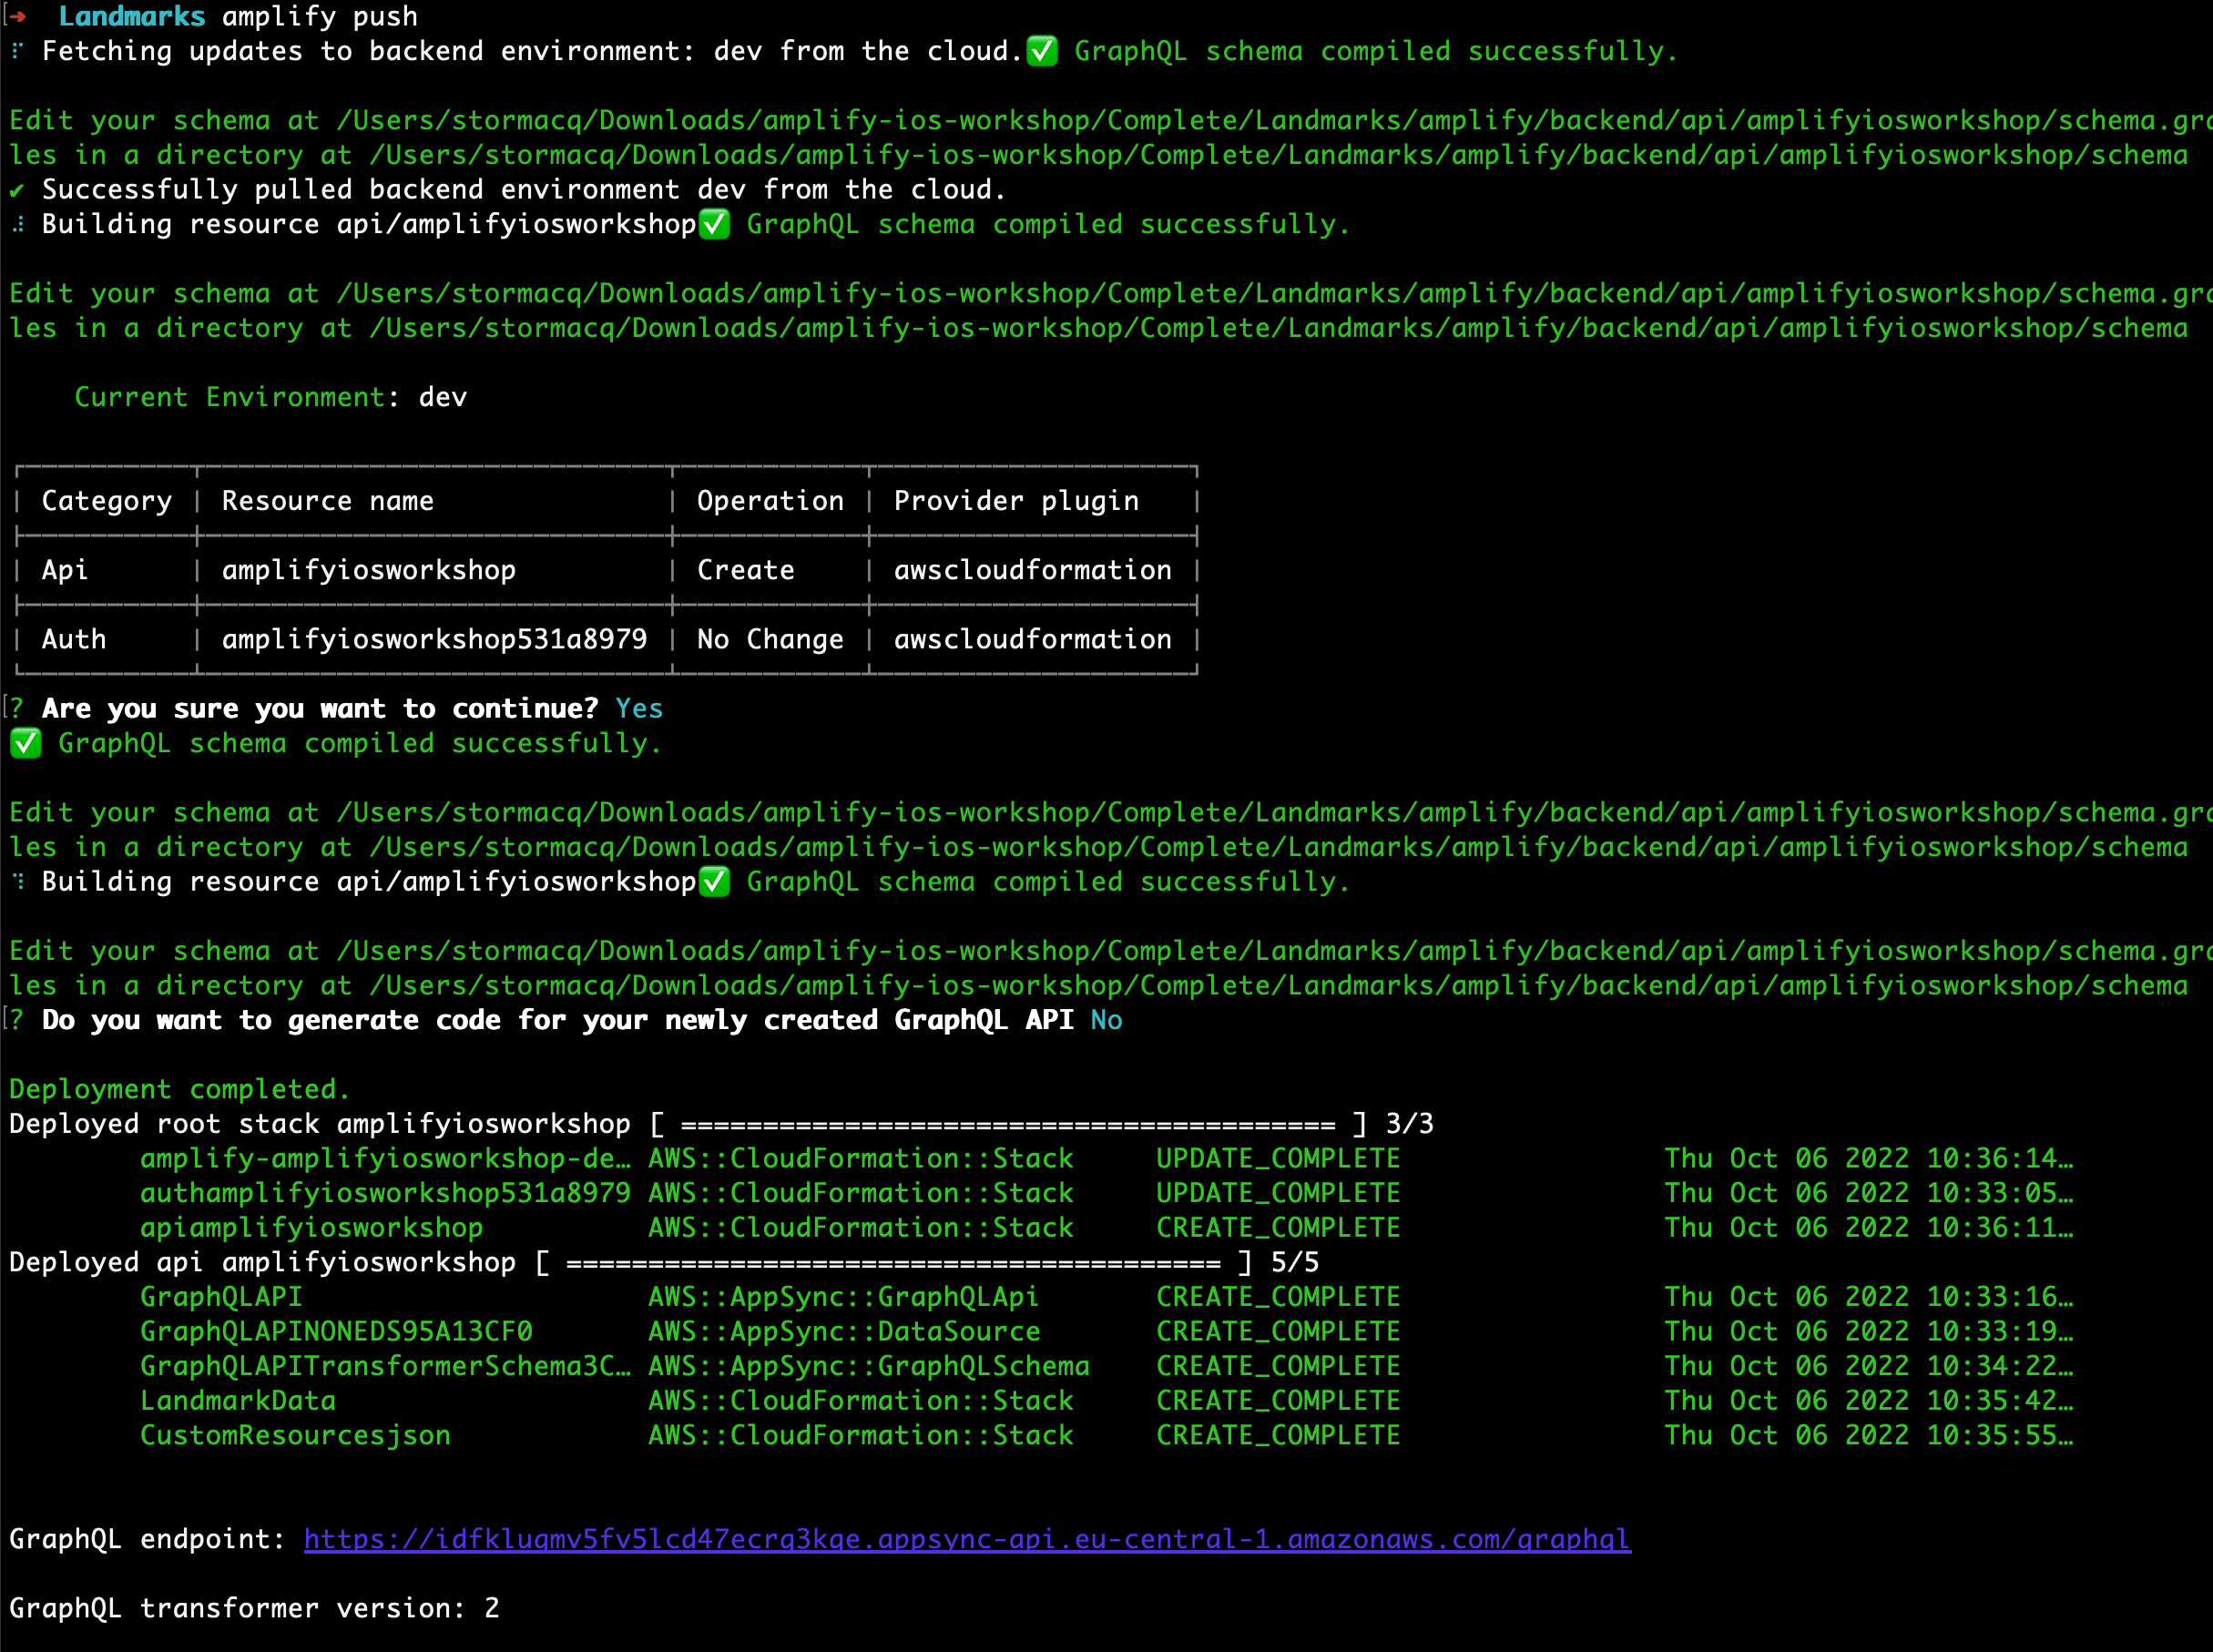
Amplify creates the backend infrastructure : an AWS AppSync API and a Amazon DynamoDB table. In the next section, we will use Amplify to create swift client code to easily access the API from our application. We will add this code to our project.
At this point, without having to write any code, we now have a GraphQL API that will let us perform CRUDL operations on our Landmarks data types!
But don’t worry, the way AWS AppSync is resolving fields into data isn’t hidden from us. Each resolver that was automatically generated is available for us to edit as we see fit. For now, let’s try out adding some data using the API.
Upload existing application data
The sample application we started from uses a local file (Landmarks/Resources/landmarkData.json) to hold the application data. We provide a script to upload the content of this file to the cloud database.
In a Terminal, type:
cd $PROJECT_DIRECTORY
../../scripts/init_db.sh
The script should output the following:
Checking prerequisites
Getting an access token
CLIENT_ID=t33xxxxxxxxxxxxxxxxxxx3fk
CLIENT_SECRET=fuhxxxxxxxxxxxxxxxxxxx9c7
AUTHENTICATION=Basic dDMxxxxxxxxxxxxxxxxxxx5Yzc=
Importing Data
Uploading data to https://idxxxxxxxxxxxxxxxxxxxkqe.appsync-api.eu-central-1.amazonaws.com/graphql
{"data":{"createLandmarkData":{"id":"1001"}}}
{"data":{"createLandmarkData":{"id":"1002"}}}
{"data":{"createLandmarkData":{"id":"1003"}}}
{"data":{"createLandmarkData":{"id":"1004"}}}
{"data":{"createLandmarkData":{"id":"1005"}}}
{"data":{"createLandmarkData":{"id":"1006"}}}
{"data":{"createLandmarkData":{"id":"1007"}}}
{"data":{"createLandmarkData":{"id":"1008"}}}
{"data":{"createLandmarkData":{"id":"1009"}}}
{"data":{"createLandmarkData":{"id":"1010"}}}
{"data":{"createLandmarkData":{"id":"1011"}}}
{"data":{"createLandmarkData":{"id":"1012"}}}
Cleaning up
Done - success
If you downloaded the sample project from Apple’s Developer website instead of the link provided in section 2, the above script will fail because of a syntax error in the JSON data file. To fix this, edit Landmarks/Resources/landmarkData.json and remove the extra , at the end of line 105.
If you’re curious about how this script works, continue to read below, otherwise feel free to skip to the next section.
Anatomy of the import script (optional)
The script leverages the GraphQL API we just created to import the data from landmarksData.json file. In order to call the API, we need a valid Cognito User Pool token. But the script has no known username or password to pass to Cognito. So it takes advantage of having IAM Admin priviledge to temporarly add a new new client to the Cognito User Pool. The script creates a special type of client that do not need a username or password, a client_credentials client type. This type of client is designed for application-to-application API access. You can learn more about Cognito User Pool client types in this blog post. The script requests a Cognito token to that client and uses the token to authenticate against the GraphQL API.
At high level, the flow of the script is as following :
- create a Cognito Resource Server (this is required when using client_credentials clients) (
aws cognito-idp create-resource-serverline 23) - create a Cognito User Pool client of type client_credentials (
aws cognito-idp create-user-pool-clientline 35) - retrieve the client id and client secret to authenticate calls to Cognito end point (lines 44-45)
- use cURL command to get a Cognito token (line 57-64)
- prepare a GraphQL mutation request and read the data from the application resource file (lines 93-101)
- for each landmark, merge the JSON data in the GraphQL query and call the AppSync endpoint (passing the Cognito token for authentication) (lines 82-88)
- cleanup everything (lines 105-113)