Sign in With Apple
Nowadays, most applications allow users to sign-in using a third-party identity, defined and managed outside of your app. This is known as Identity Federation. Amazon Cognito does support Identity Federation out of the box with Login With Amazon, Login with Google, Login with Facebook, Sign in with Apple, or any OIDC or SAMLv2 compliant identity provider.
Just as for regular sign in flow, you can chose to present to your customers the Cognito Hosted UI or to build your own. In this workshop, we chose to use the hosted UI because it handles most of the complexities of the OAuth flow for you.
In this section, we’re going to add a “Sign in with Apple” button to our application. Because we are using the Cognito hosted web user interface, there is no code change required to add “Sign in with Apple” or “Login with xxx”. This is a two steps process:
-
we use our developer account on Apple Developer’s portal and we configure “Sign in with Apple” for this application. This involves registering our app and the Cognito URLs on Apple Developer portal, and generate and download a private key to be included in Cognito’s configuration.
-
we update the Amplify configuration to add Apple as an identity provider.
You must have an account on Apple Developer’s portal to continue this section. You can sign in using your Apple ID, the same you are using to connect to iCloud, iMessage, and the likes. Or you can signup and create an account at https://appleid.apple.com/account
Configure Sign in with Apple on Apple Developer portal
This is a multi-steps process. First, we are going to create an App Identifier for our app. Second, we are going to create a Sign in with Apple Service Identifier and configure it with the URLs of our Cognito server. Finally, we are going to create a secret key passed to Cognito.
These three steps are done on the Apple Developer’s portal.
Create an Application Identifier
-
Using your favorite browser, navigate to Apple Developer’s portal at https://developer.apple.com. Select the Account link on the top right side. Authenticate using your Apple ID credentials.
-
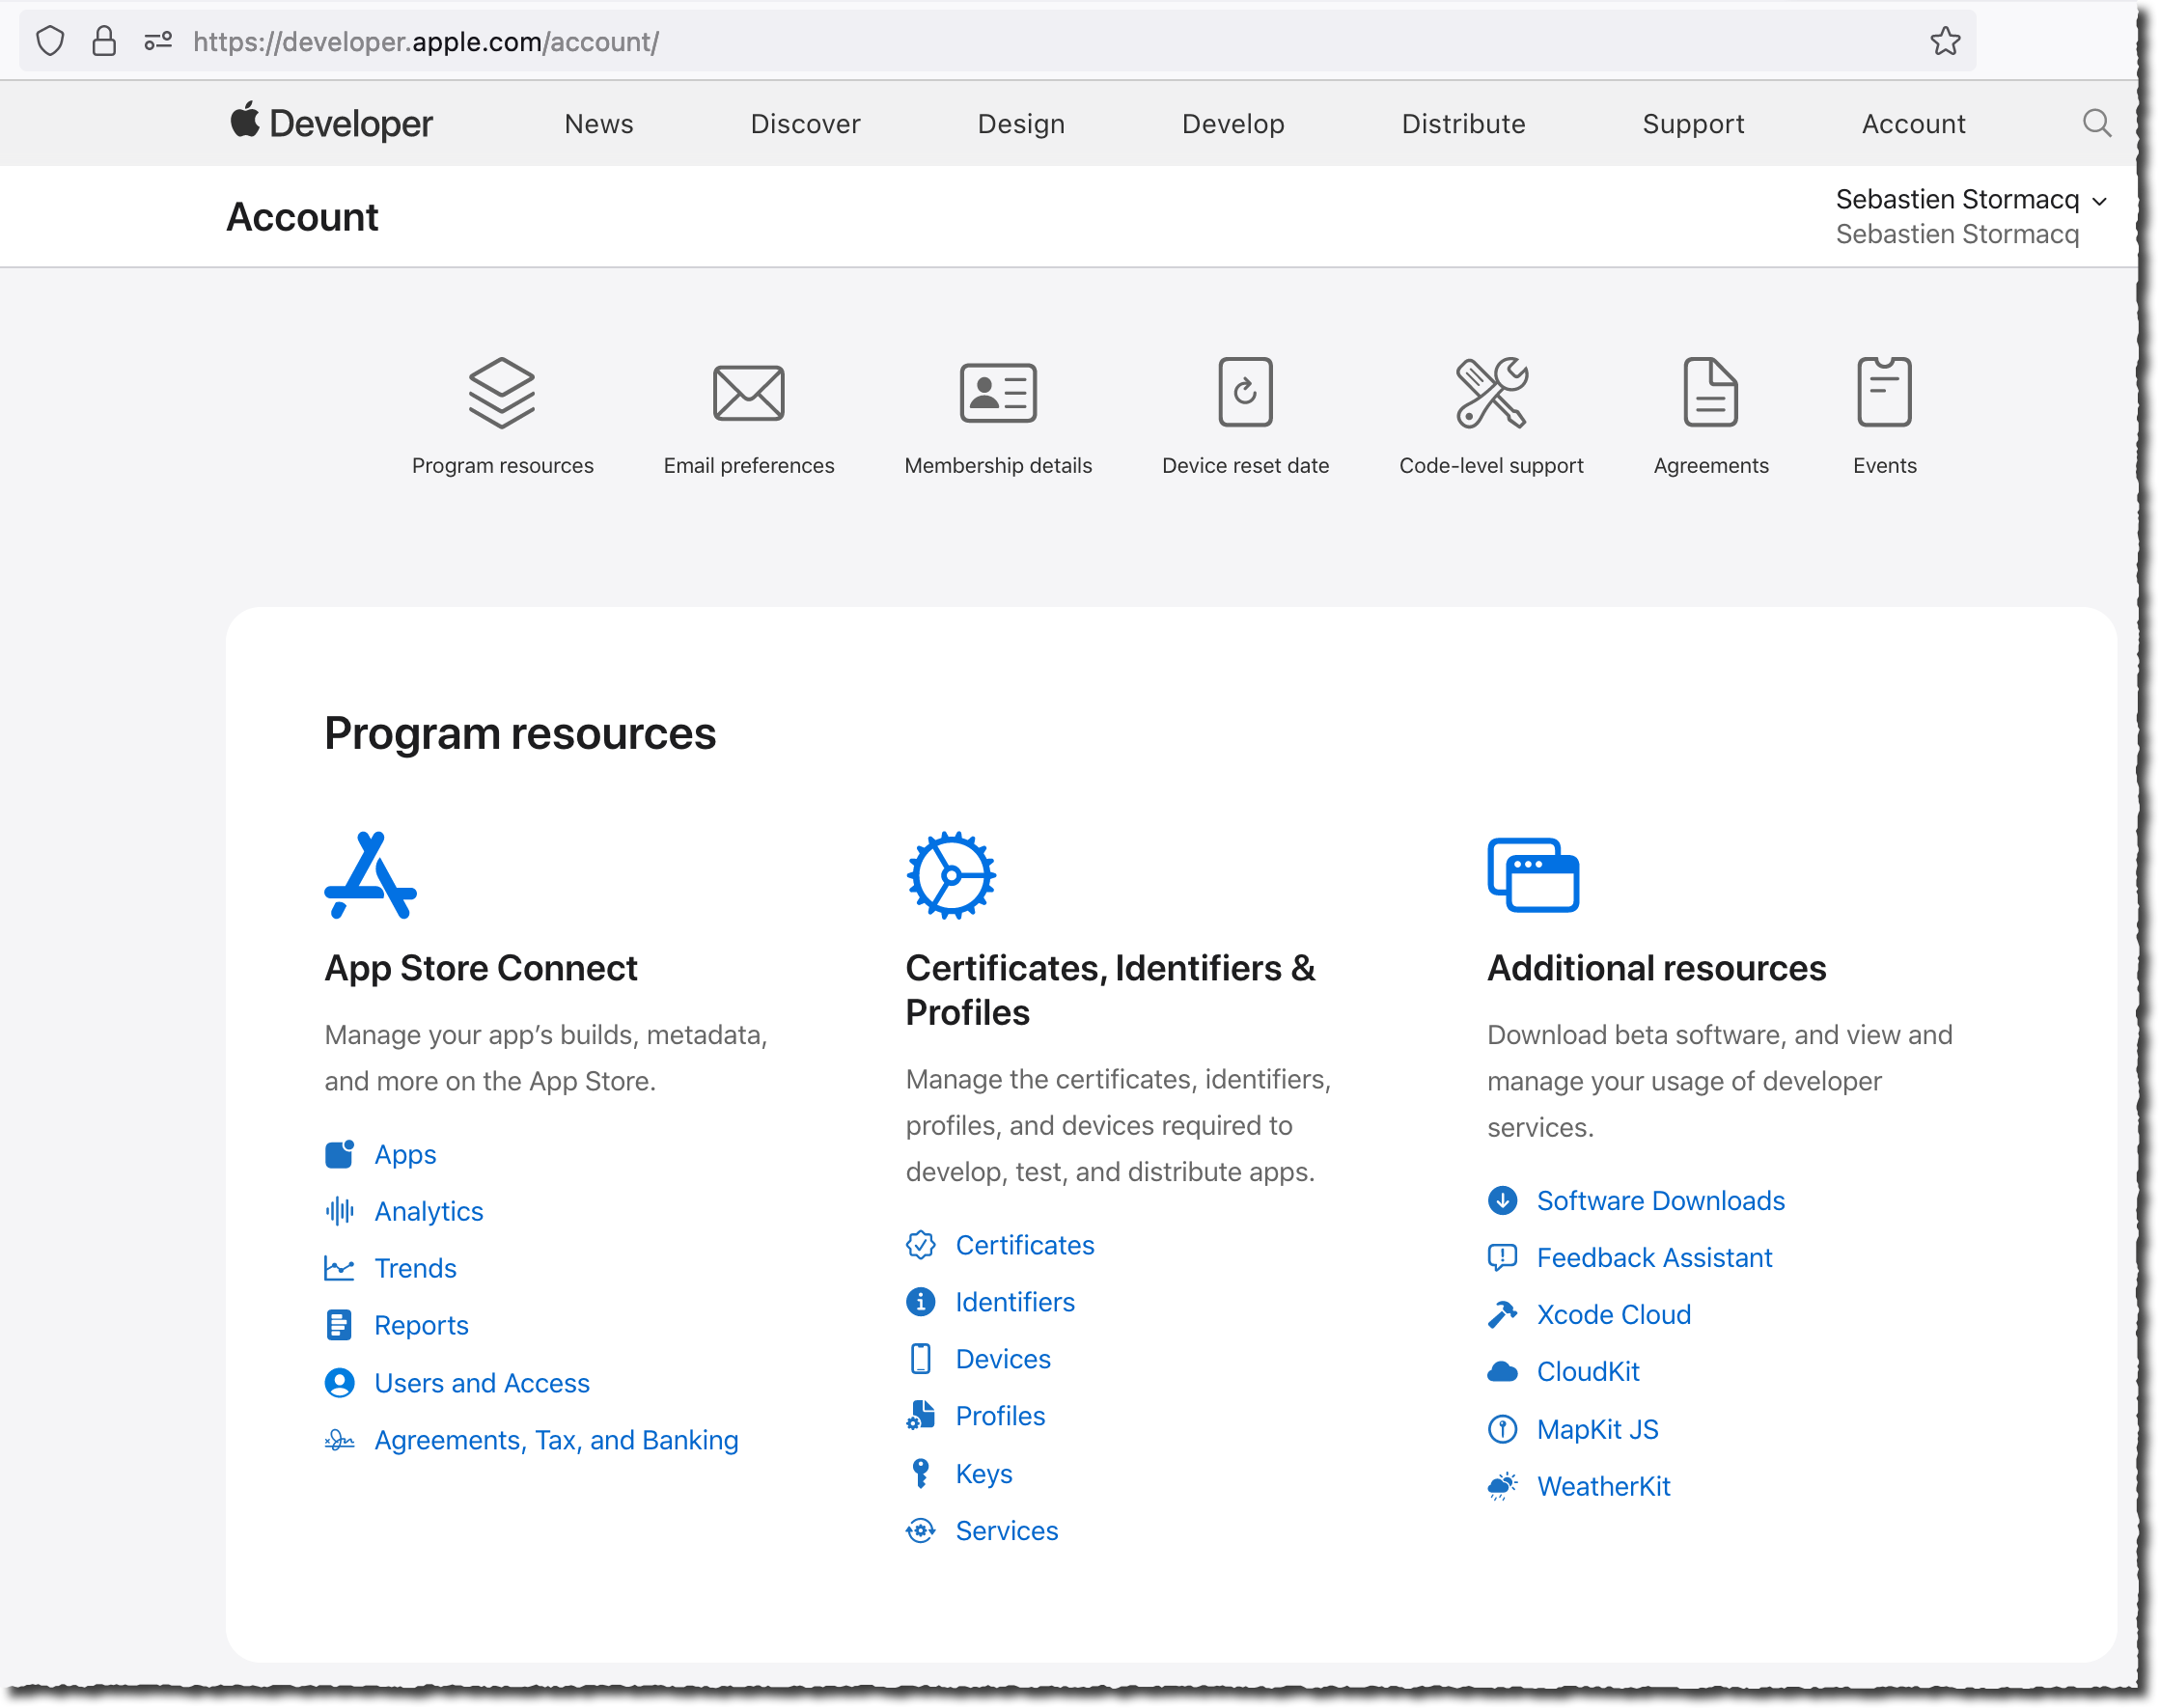
On the main page, select Identifiers (the second option on the second column).
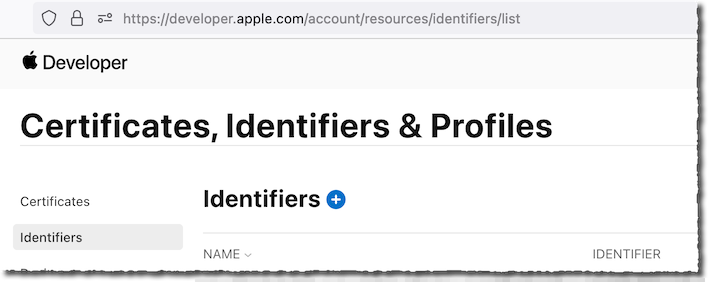
- On the Certificates, Identifiers & Profile page, select the ⊕ sign next to Identifiers to add an identifier for this app.
-
On the Register a new identifier page, ensure App IDs is selected and select Continue.
-
On the Register a new identifier > Select a type page, ensure App is selected (the default), and select Continue.
-
Enter Amplify iOS Workshop 2022 as Description and com.yourcompany.amplify.workshop.landmarks as Bundle ID. Bundle IDs must be globally unique, be sure to chose an available name. Typically, it uses your company reverse DNS name.
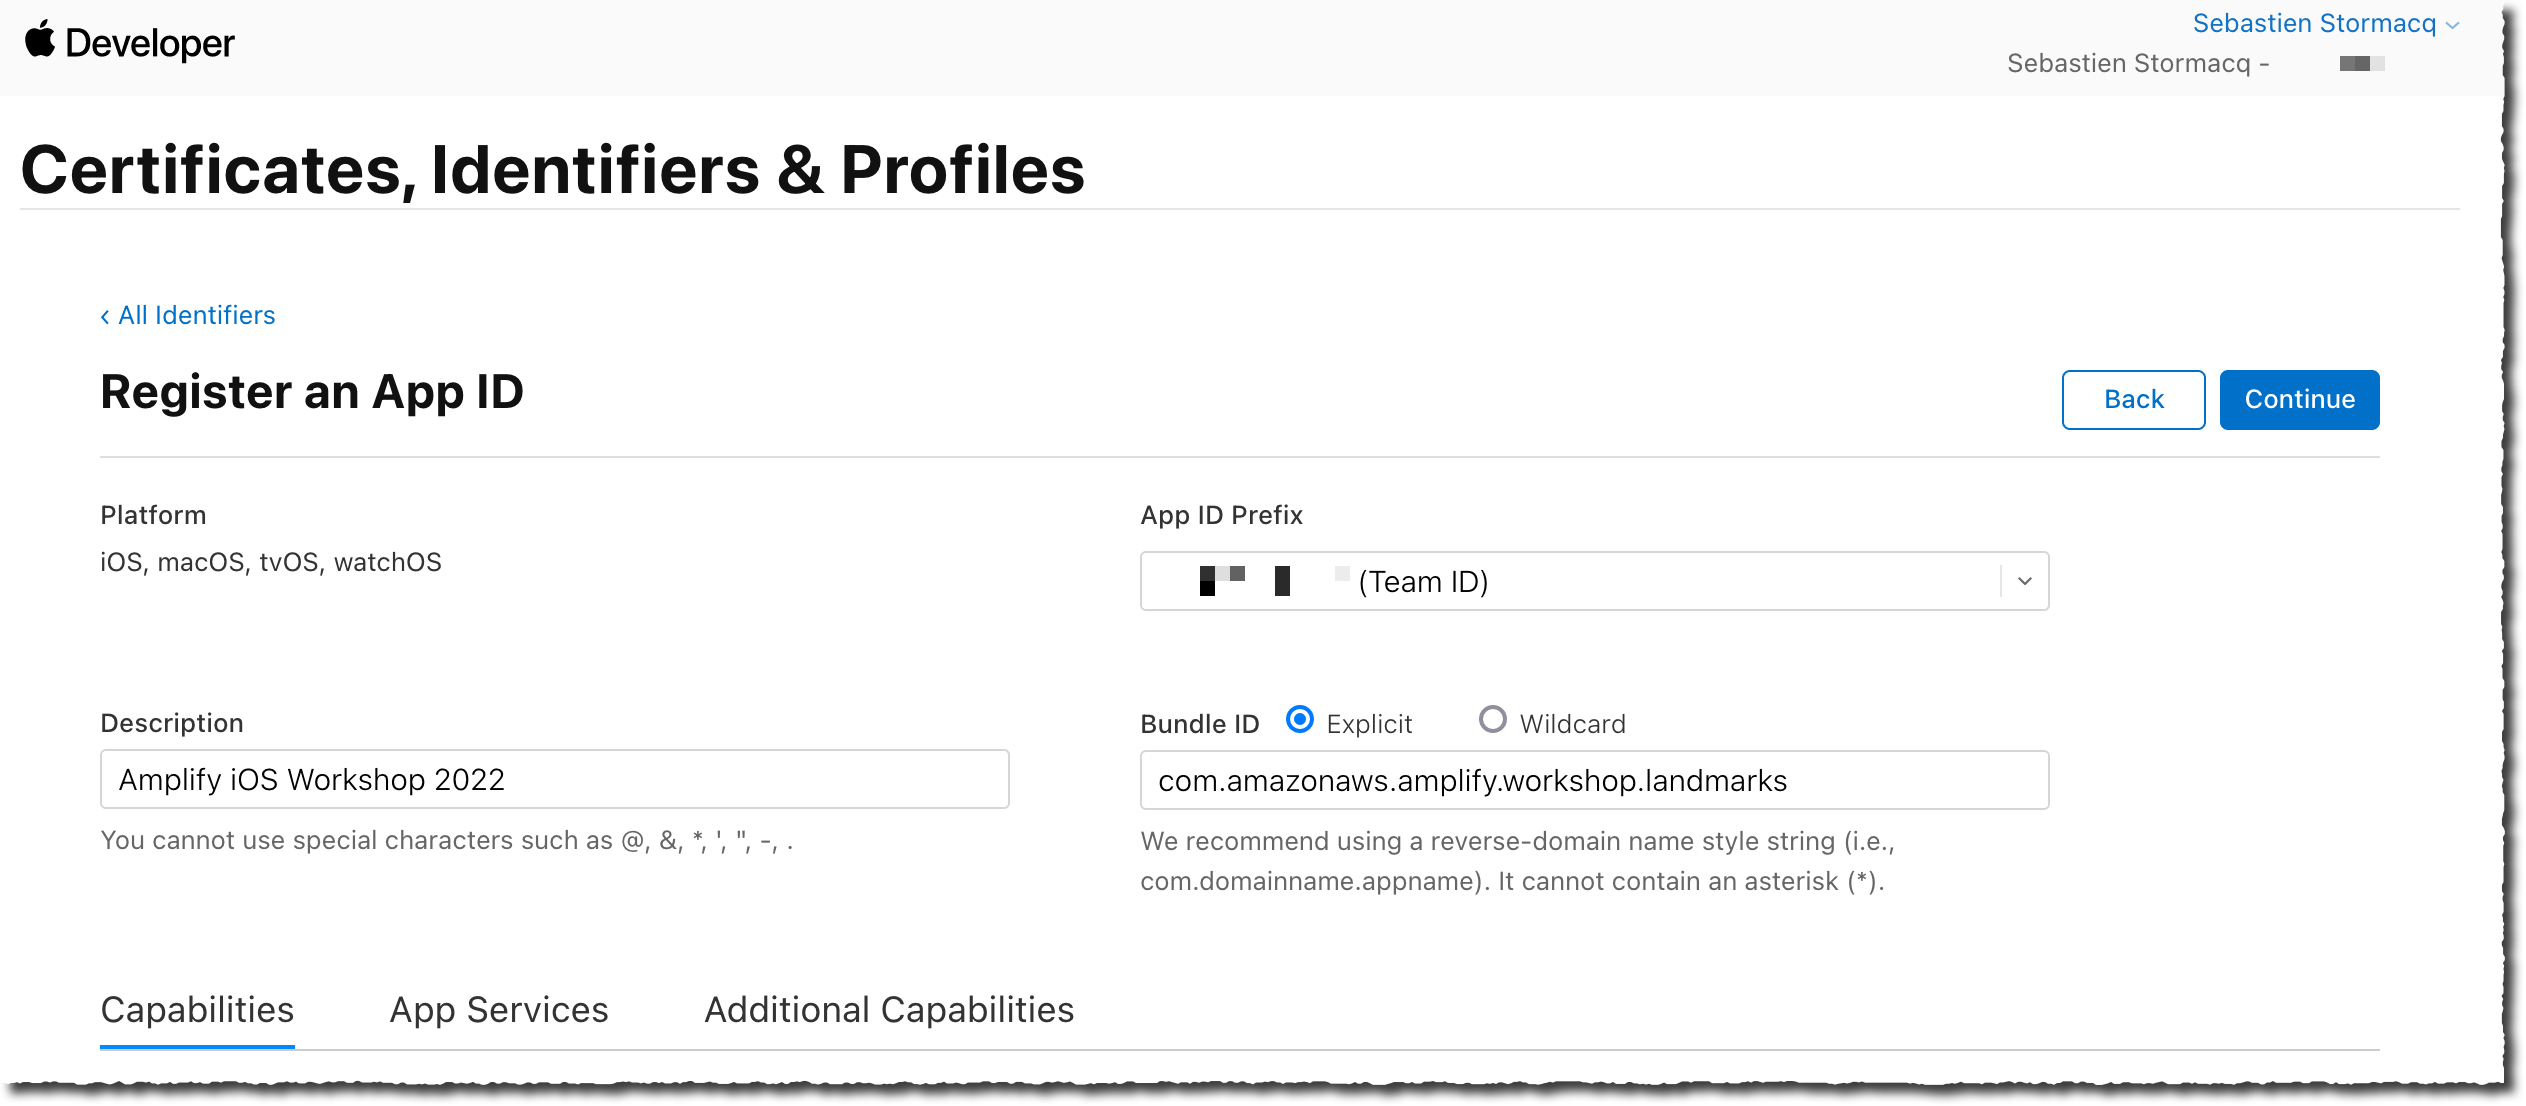
Take note of the App ID Prefix (Team ID) as we will pass this value to Amplify later on
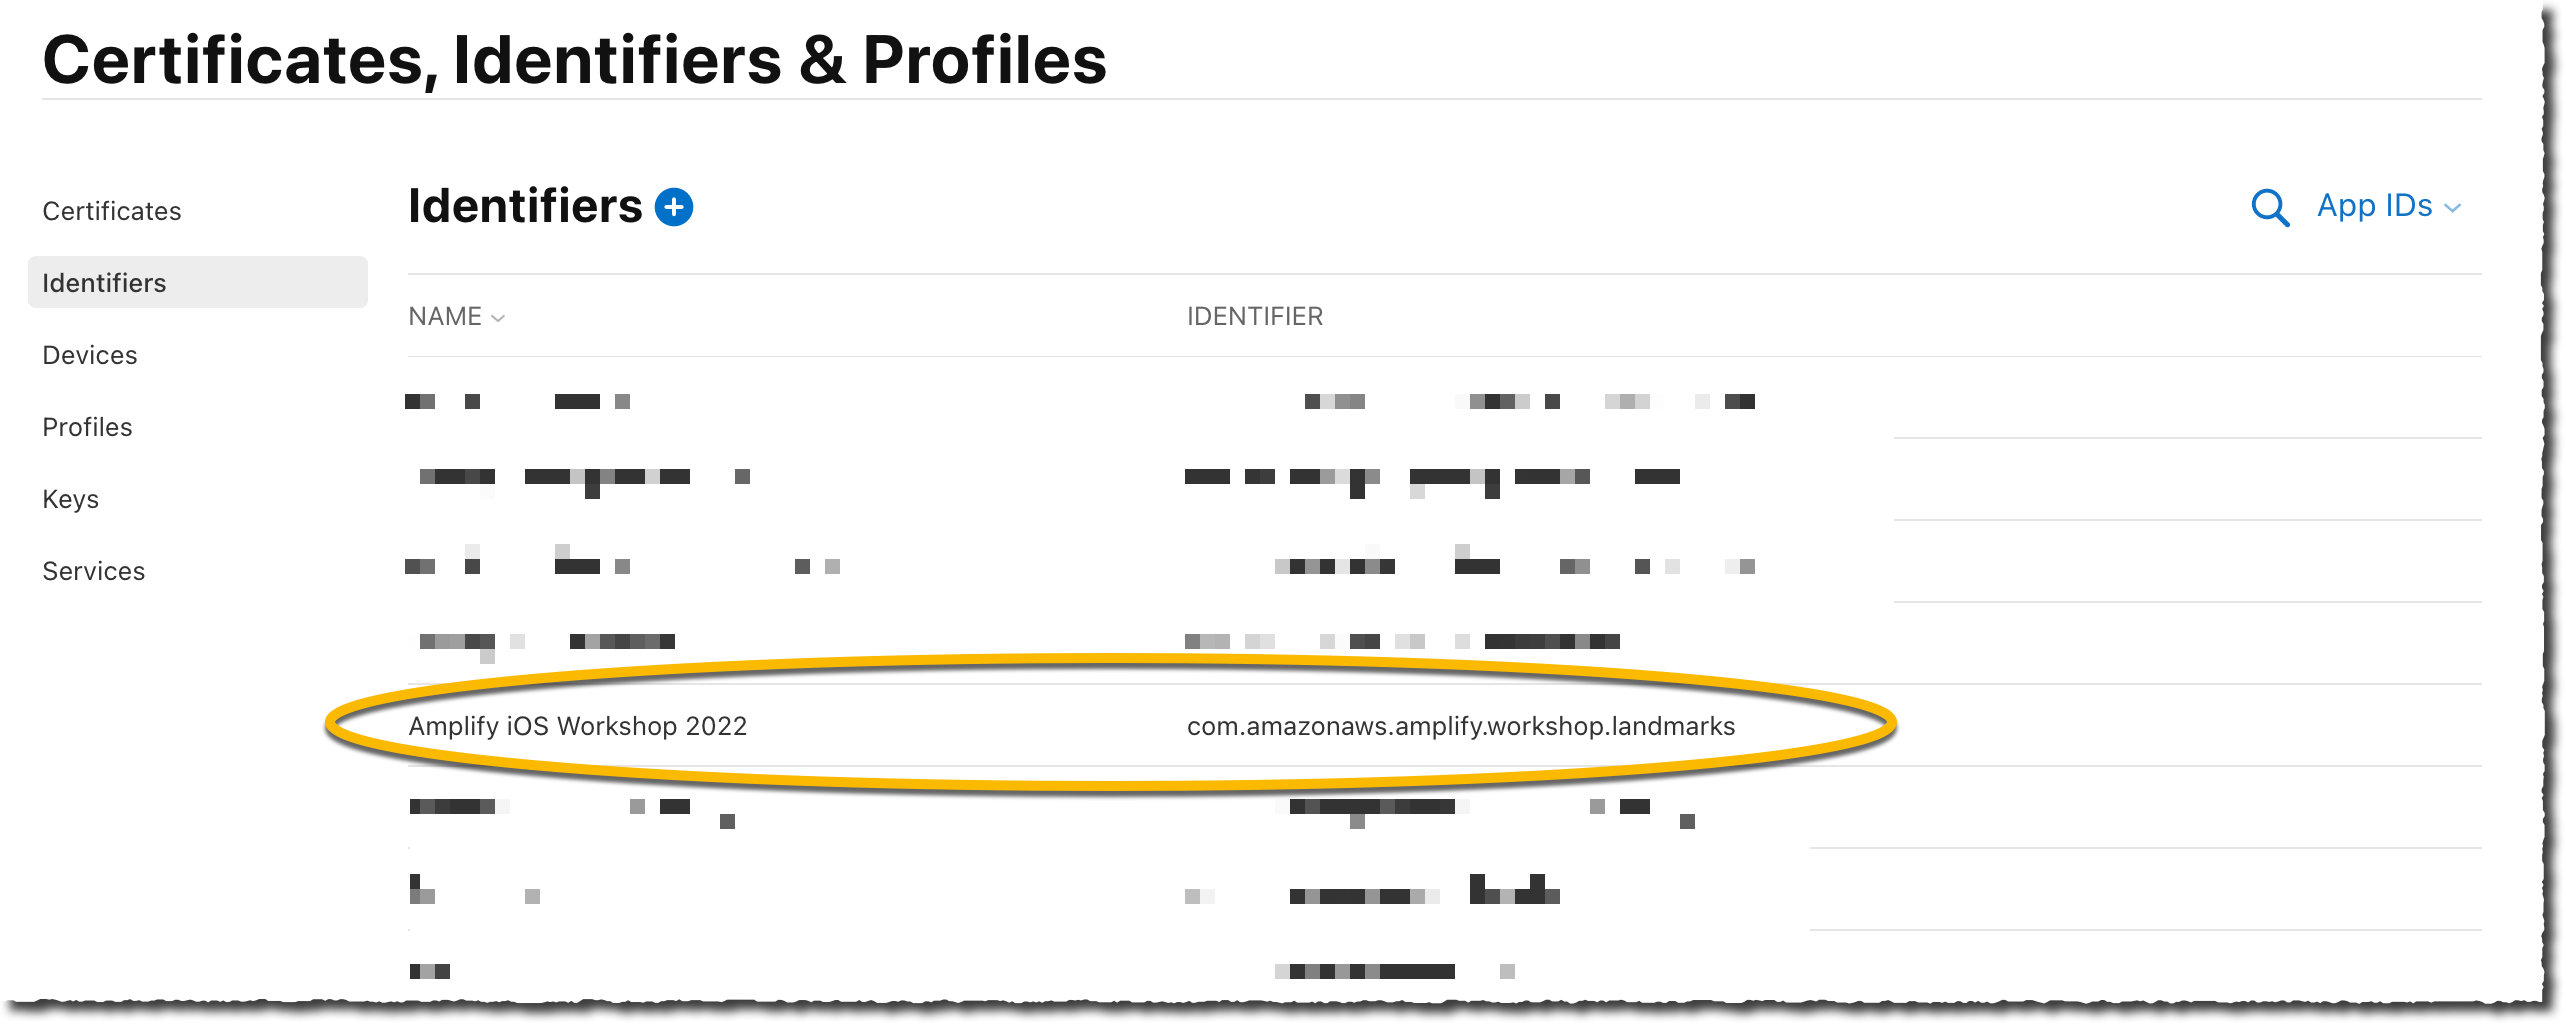
- Scroll down that page and select Sign in with Apple. Select Continue on the top of the page, then select Register on next page. The new identifier should appear in the list of identifiers.
Create a Service Identifier
Now that our app is registered, let’s create a Service Identifier for Sign in with Apple.
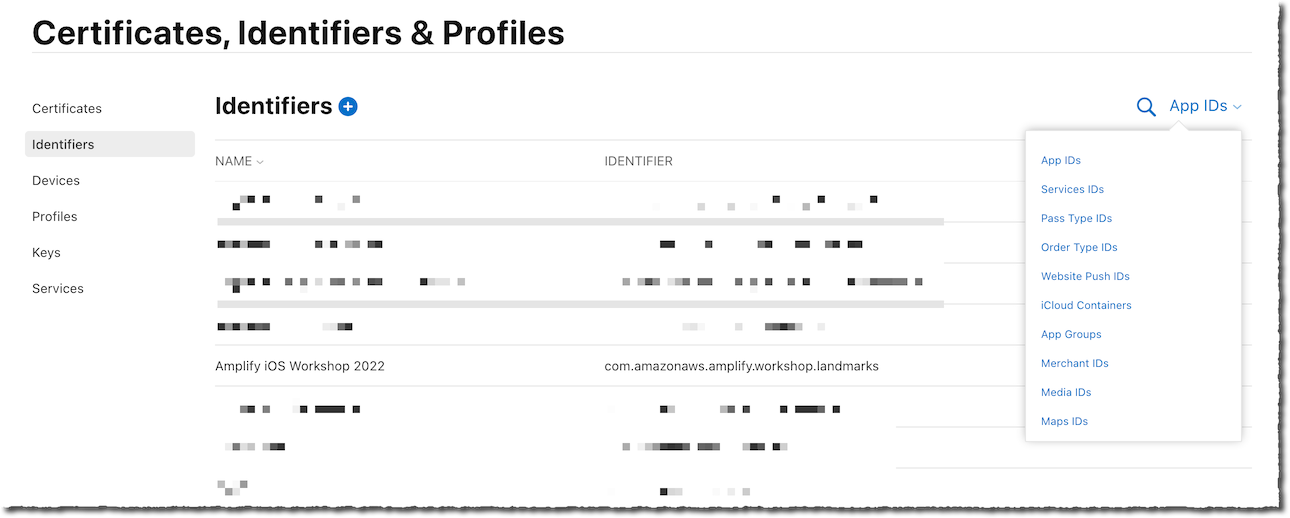
- On the Certificates, Identifiers & Profile page, select App IDs drop down menu on the top right side, then select Services IDs.
-
Select Register an Services ID blue button in the middle of the page.
-
On the Register a new identifier page, select Services ID (the second option), the select Continue.
-
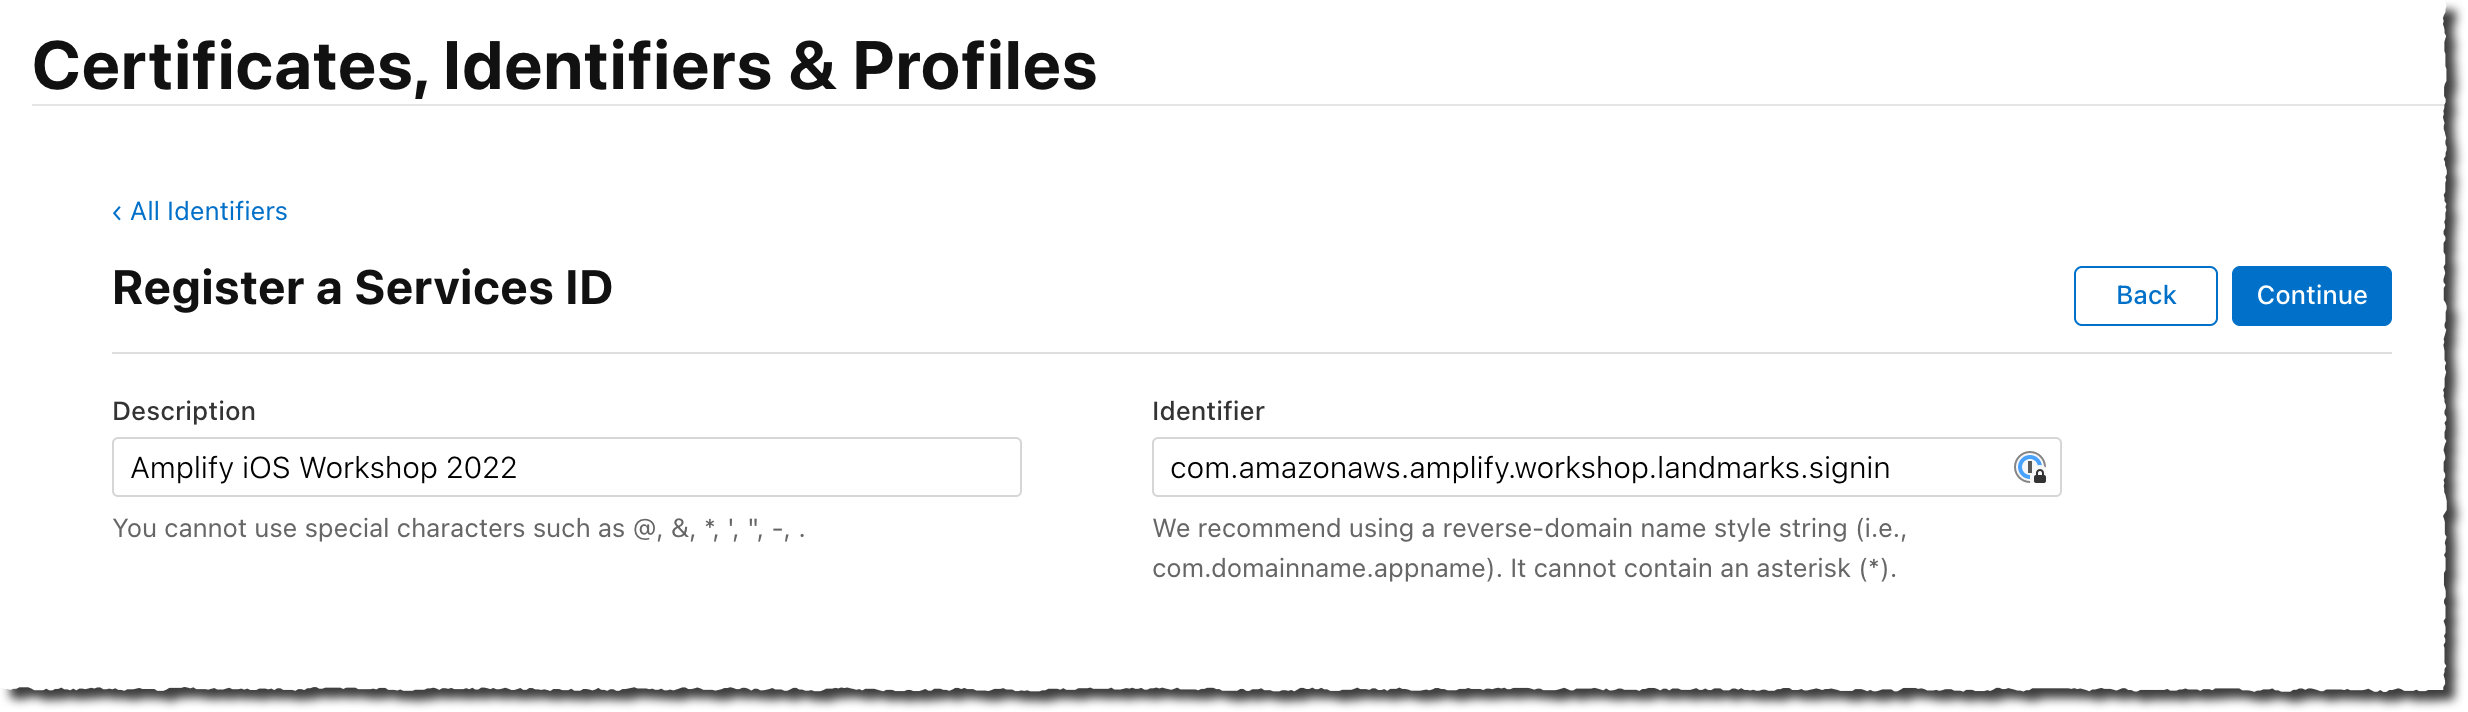
Type Amplify iOS Workshop 2022 as Description and com.yourcompany.amplify.workshop.landmarks.signin as Identifier. Note that the Service ID here must be different than the Application ID created earlier. I added
.signinat the end. I then select Continue.
-
On the next page, select Register.
-
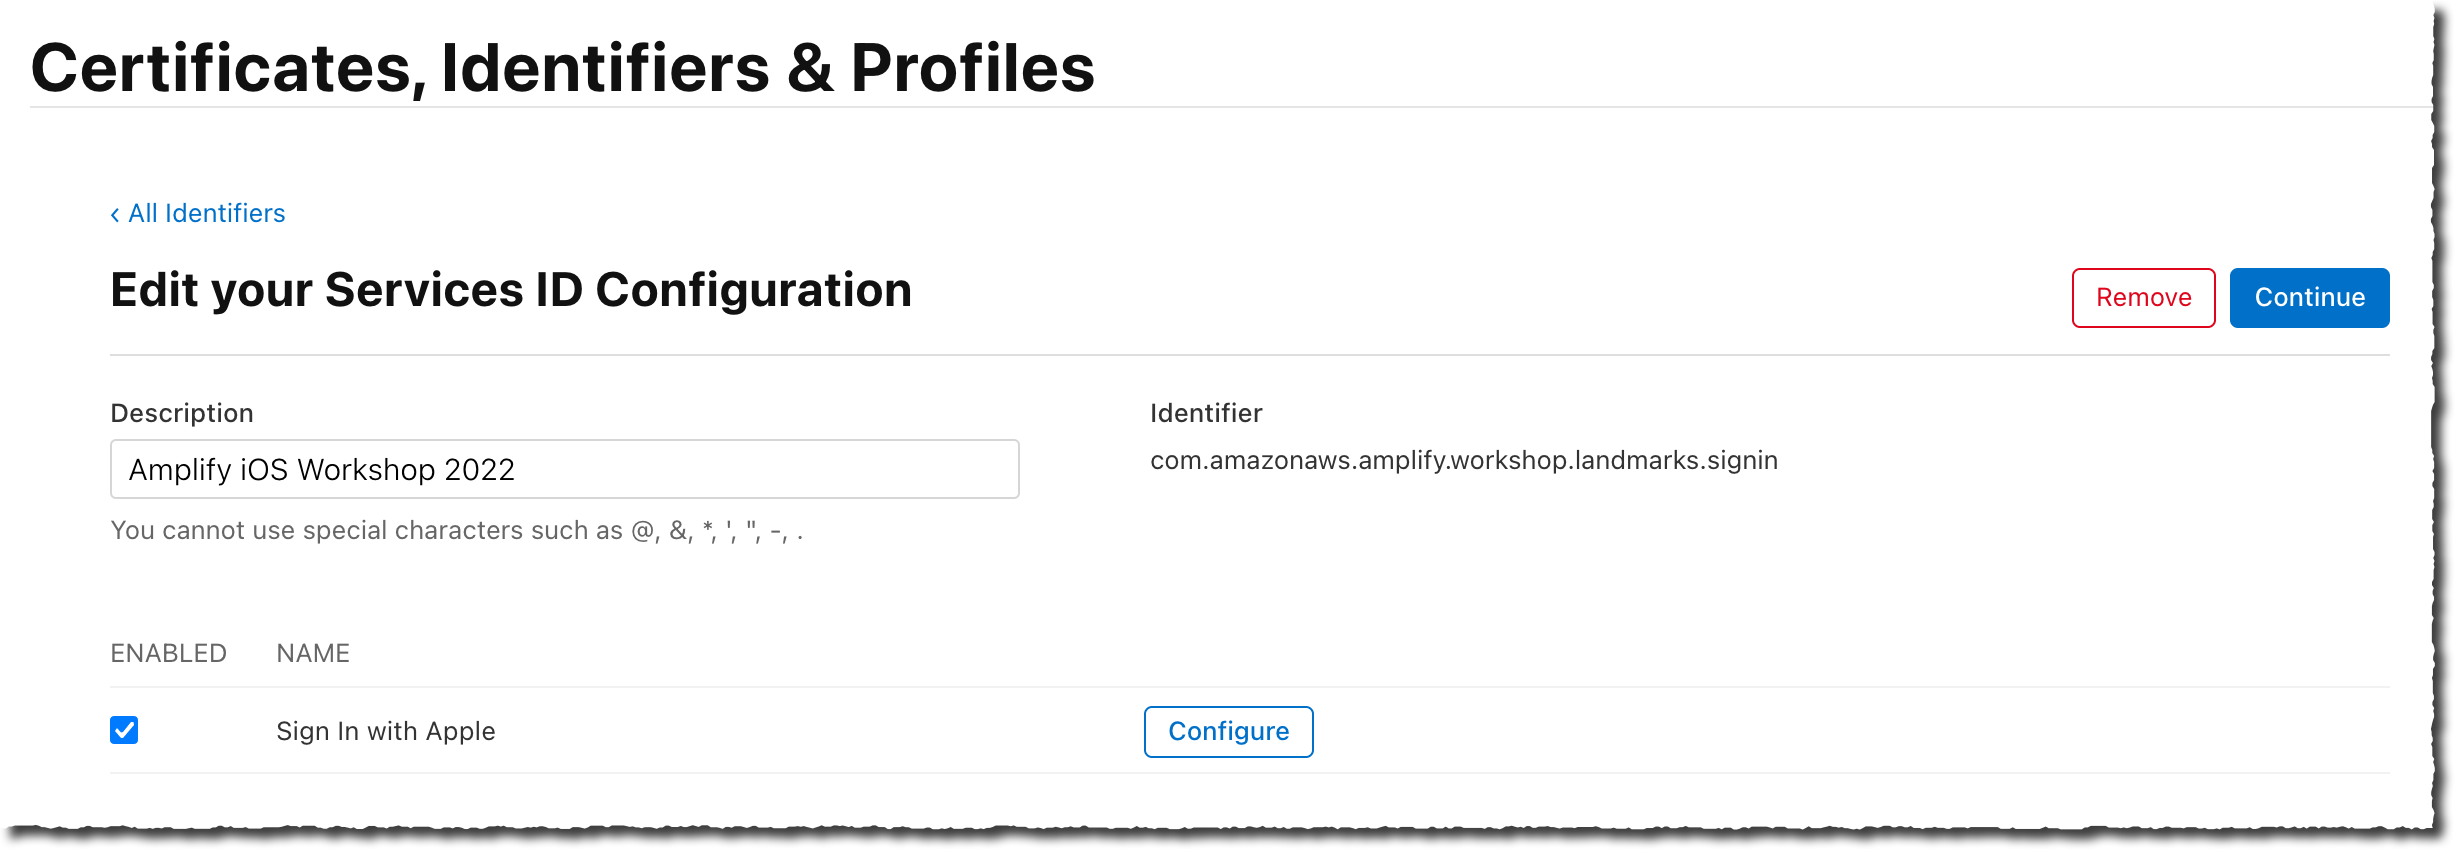
On the Identifiers > Services ID page, select the newly created service identifier for this workshop. Ensure Sign In with Apple is selected. Then select the Configure button.
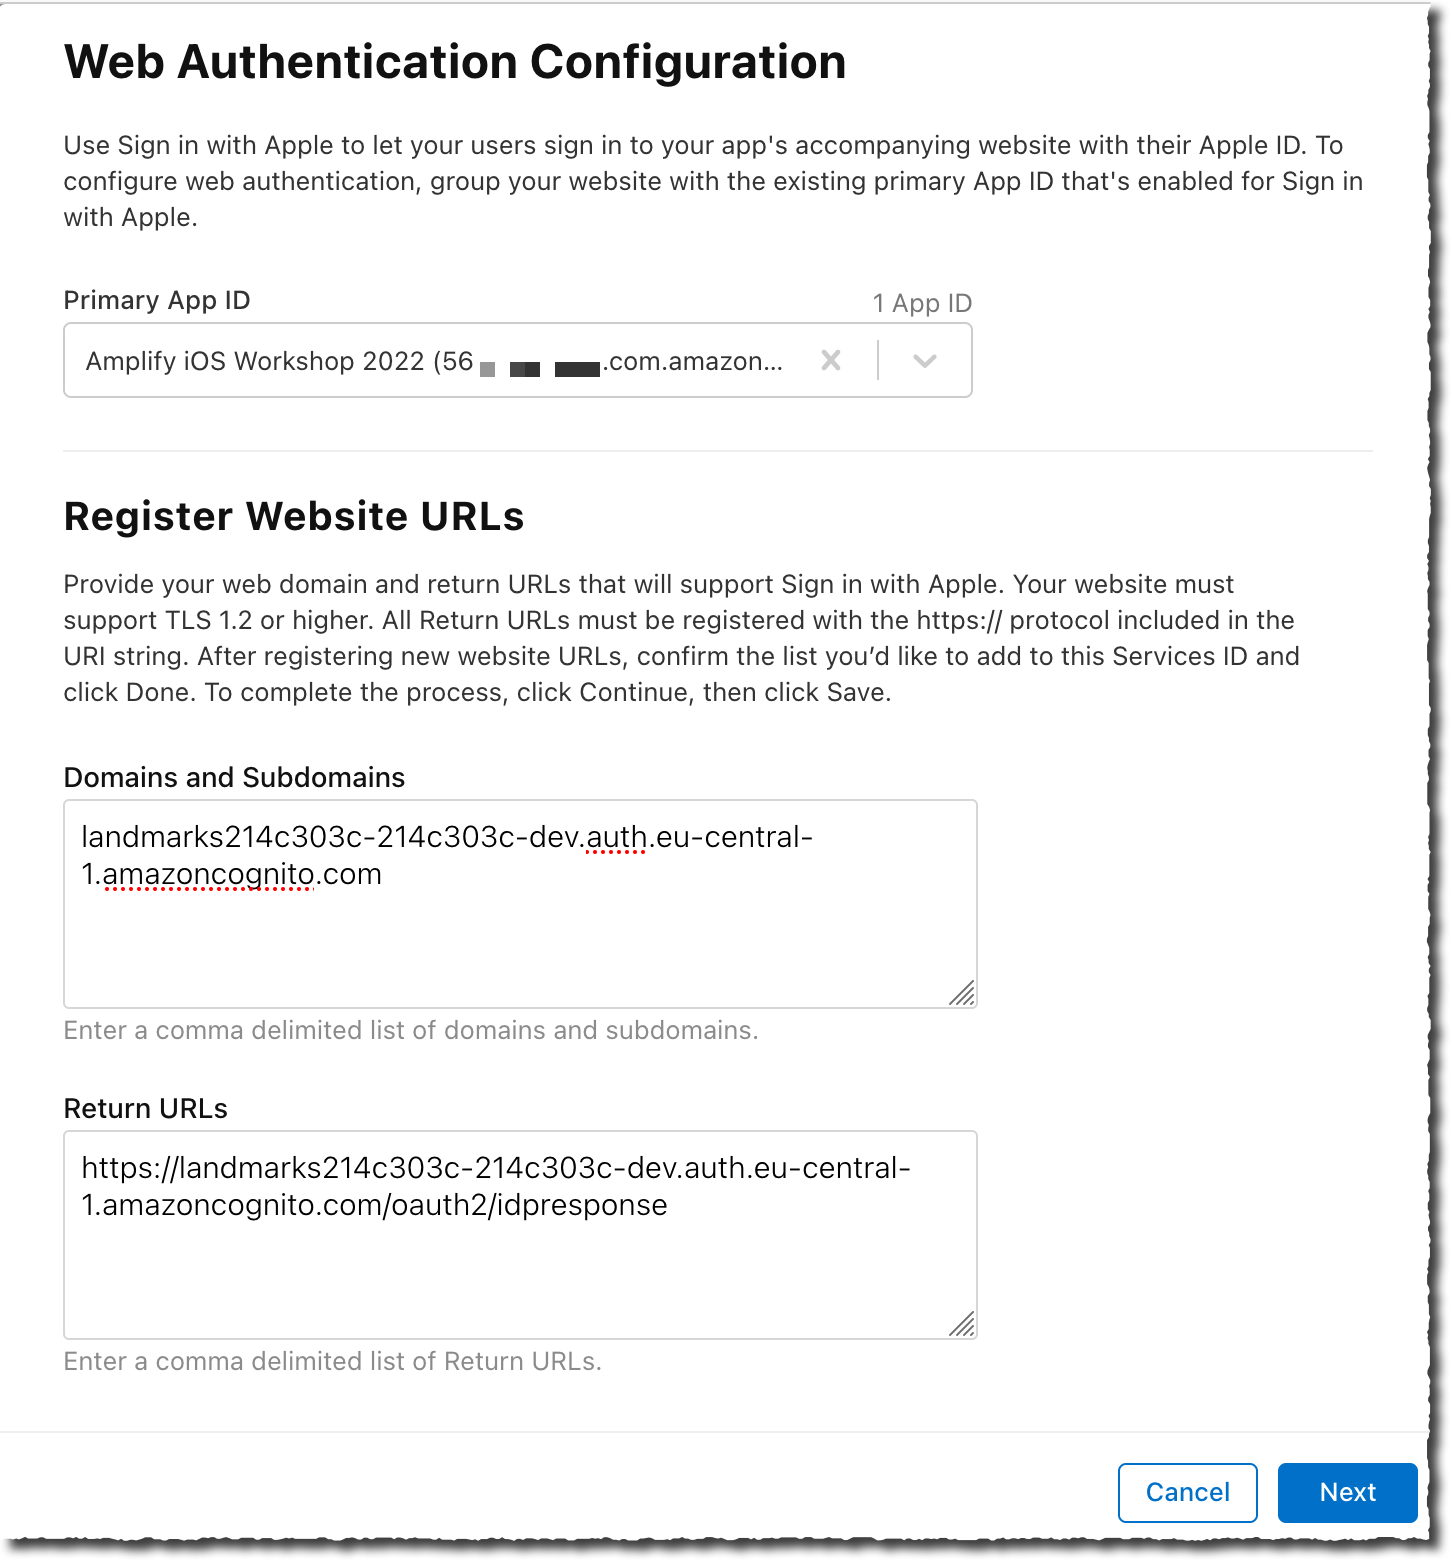
- On the Web Authentication Configuration page, select the Amplify iOS Workshop 2022 for the Primary App ID. Then enter the Domains and Subdomains value and the Return URLs.
Amplify and Cognito shared these values when you added user authentication to the Cognito configuration. You can retrieve them back by typing the amplify status command in the project directory. The value return contains a line like :
Hosted UI Endpoint: https://landmarks214c303c-214c303c-dev.auth.eu-central-1.amazoncognito.com/
The Domains and Subdomains value is the full host name without the https://.
The Return URLs value is the full URL (including https://) with /oauth2/idpresponse added to it.
Pay attention to these two values, an error will prevent Sign in with Apple to work. Proceed to the next step when you have double checked your input values.
- Finally, select Continue and Save on the next two pages to finalize the Service ID configuration.
Create a private key
The last step consists in creating a private key to validate the communication between Sign in with Apple and Cognito.
- On the Certificates, Identifiers & Profile page, select the Keys section on the left navigation menu.
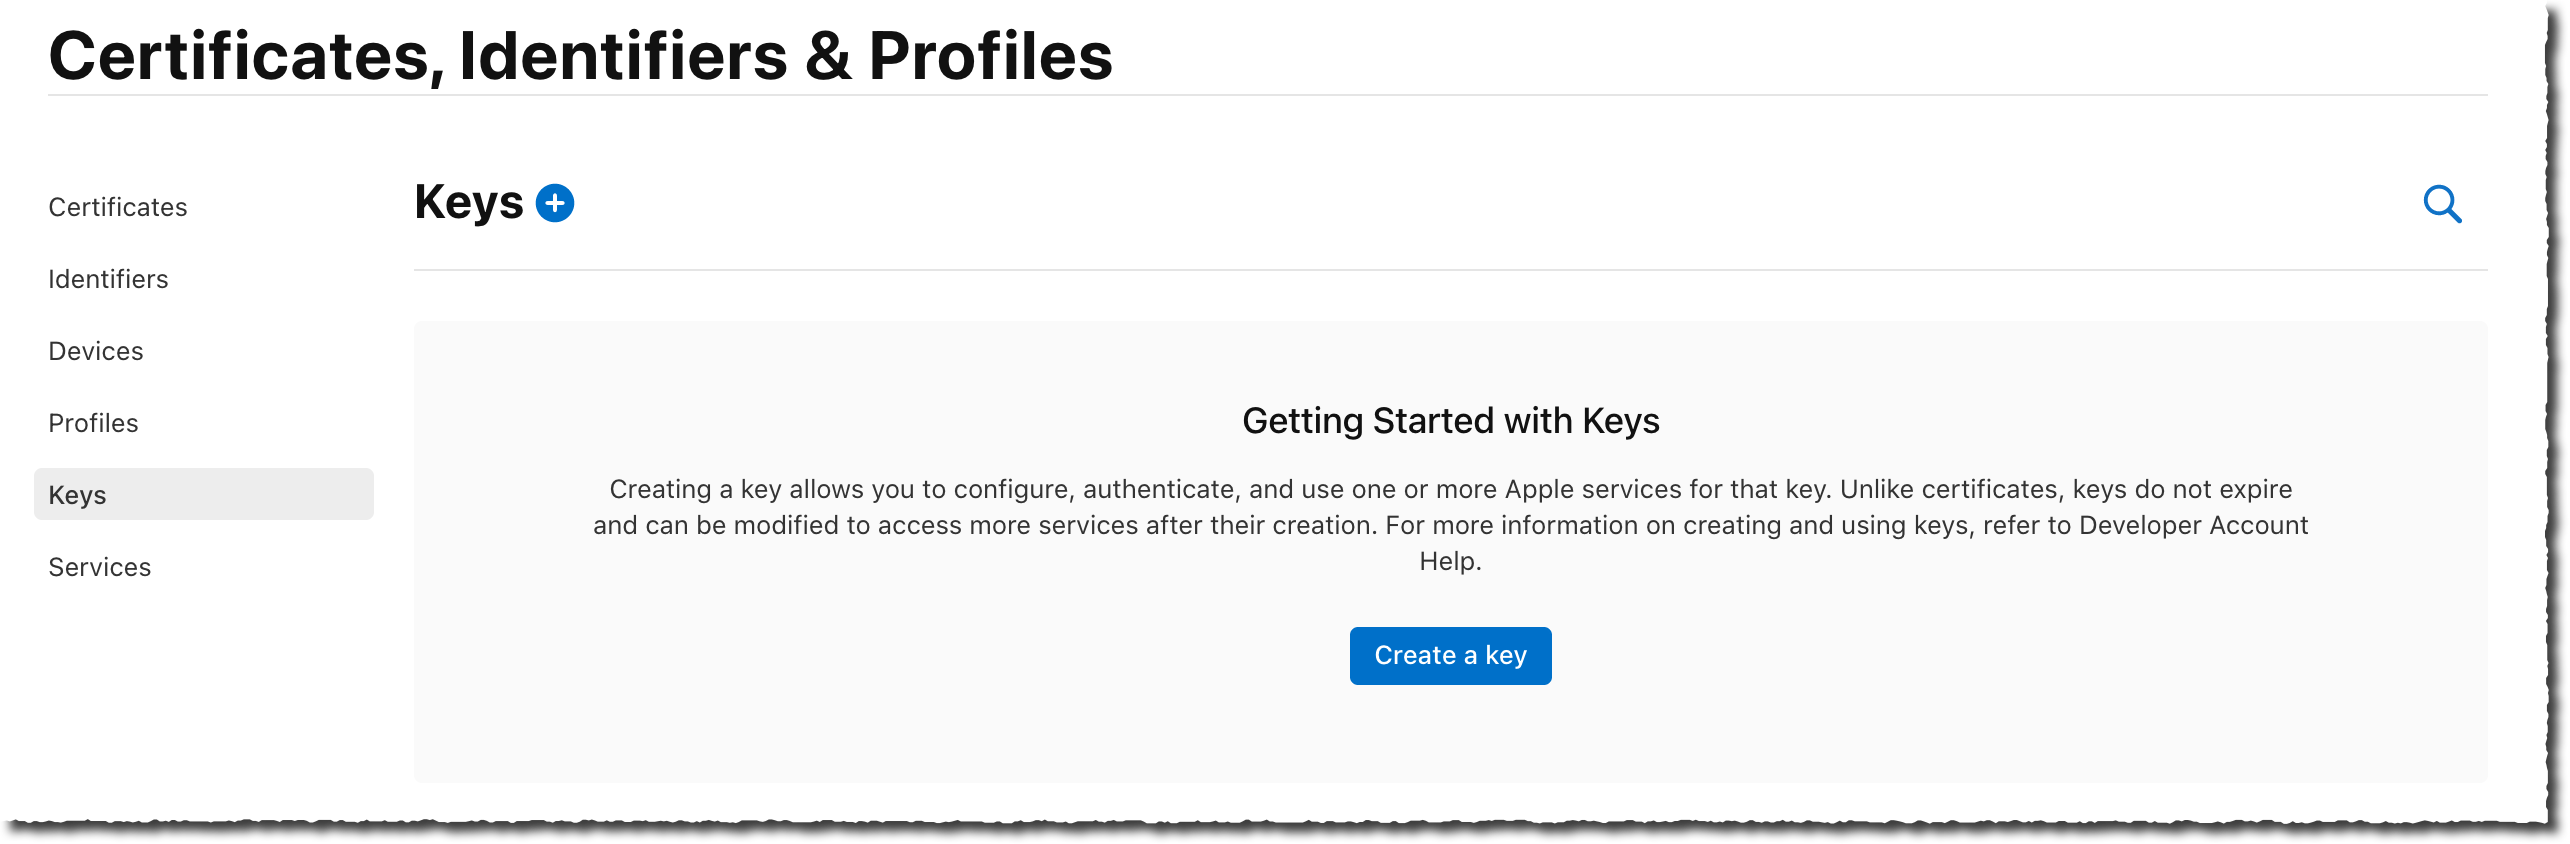
-
Select Create a key blue button in the middle of the page.
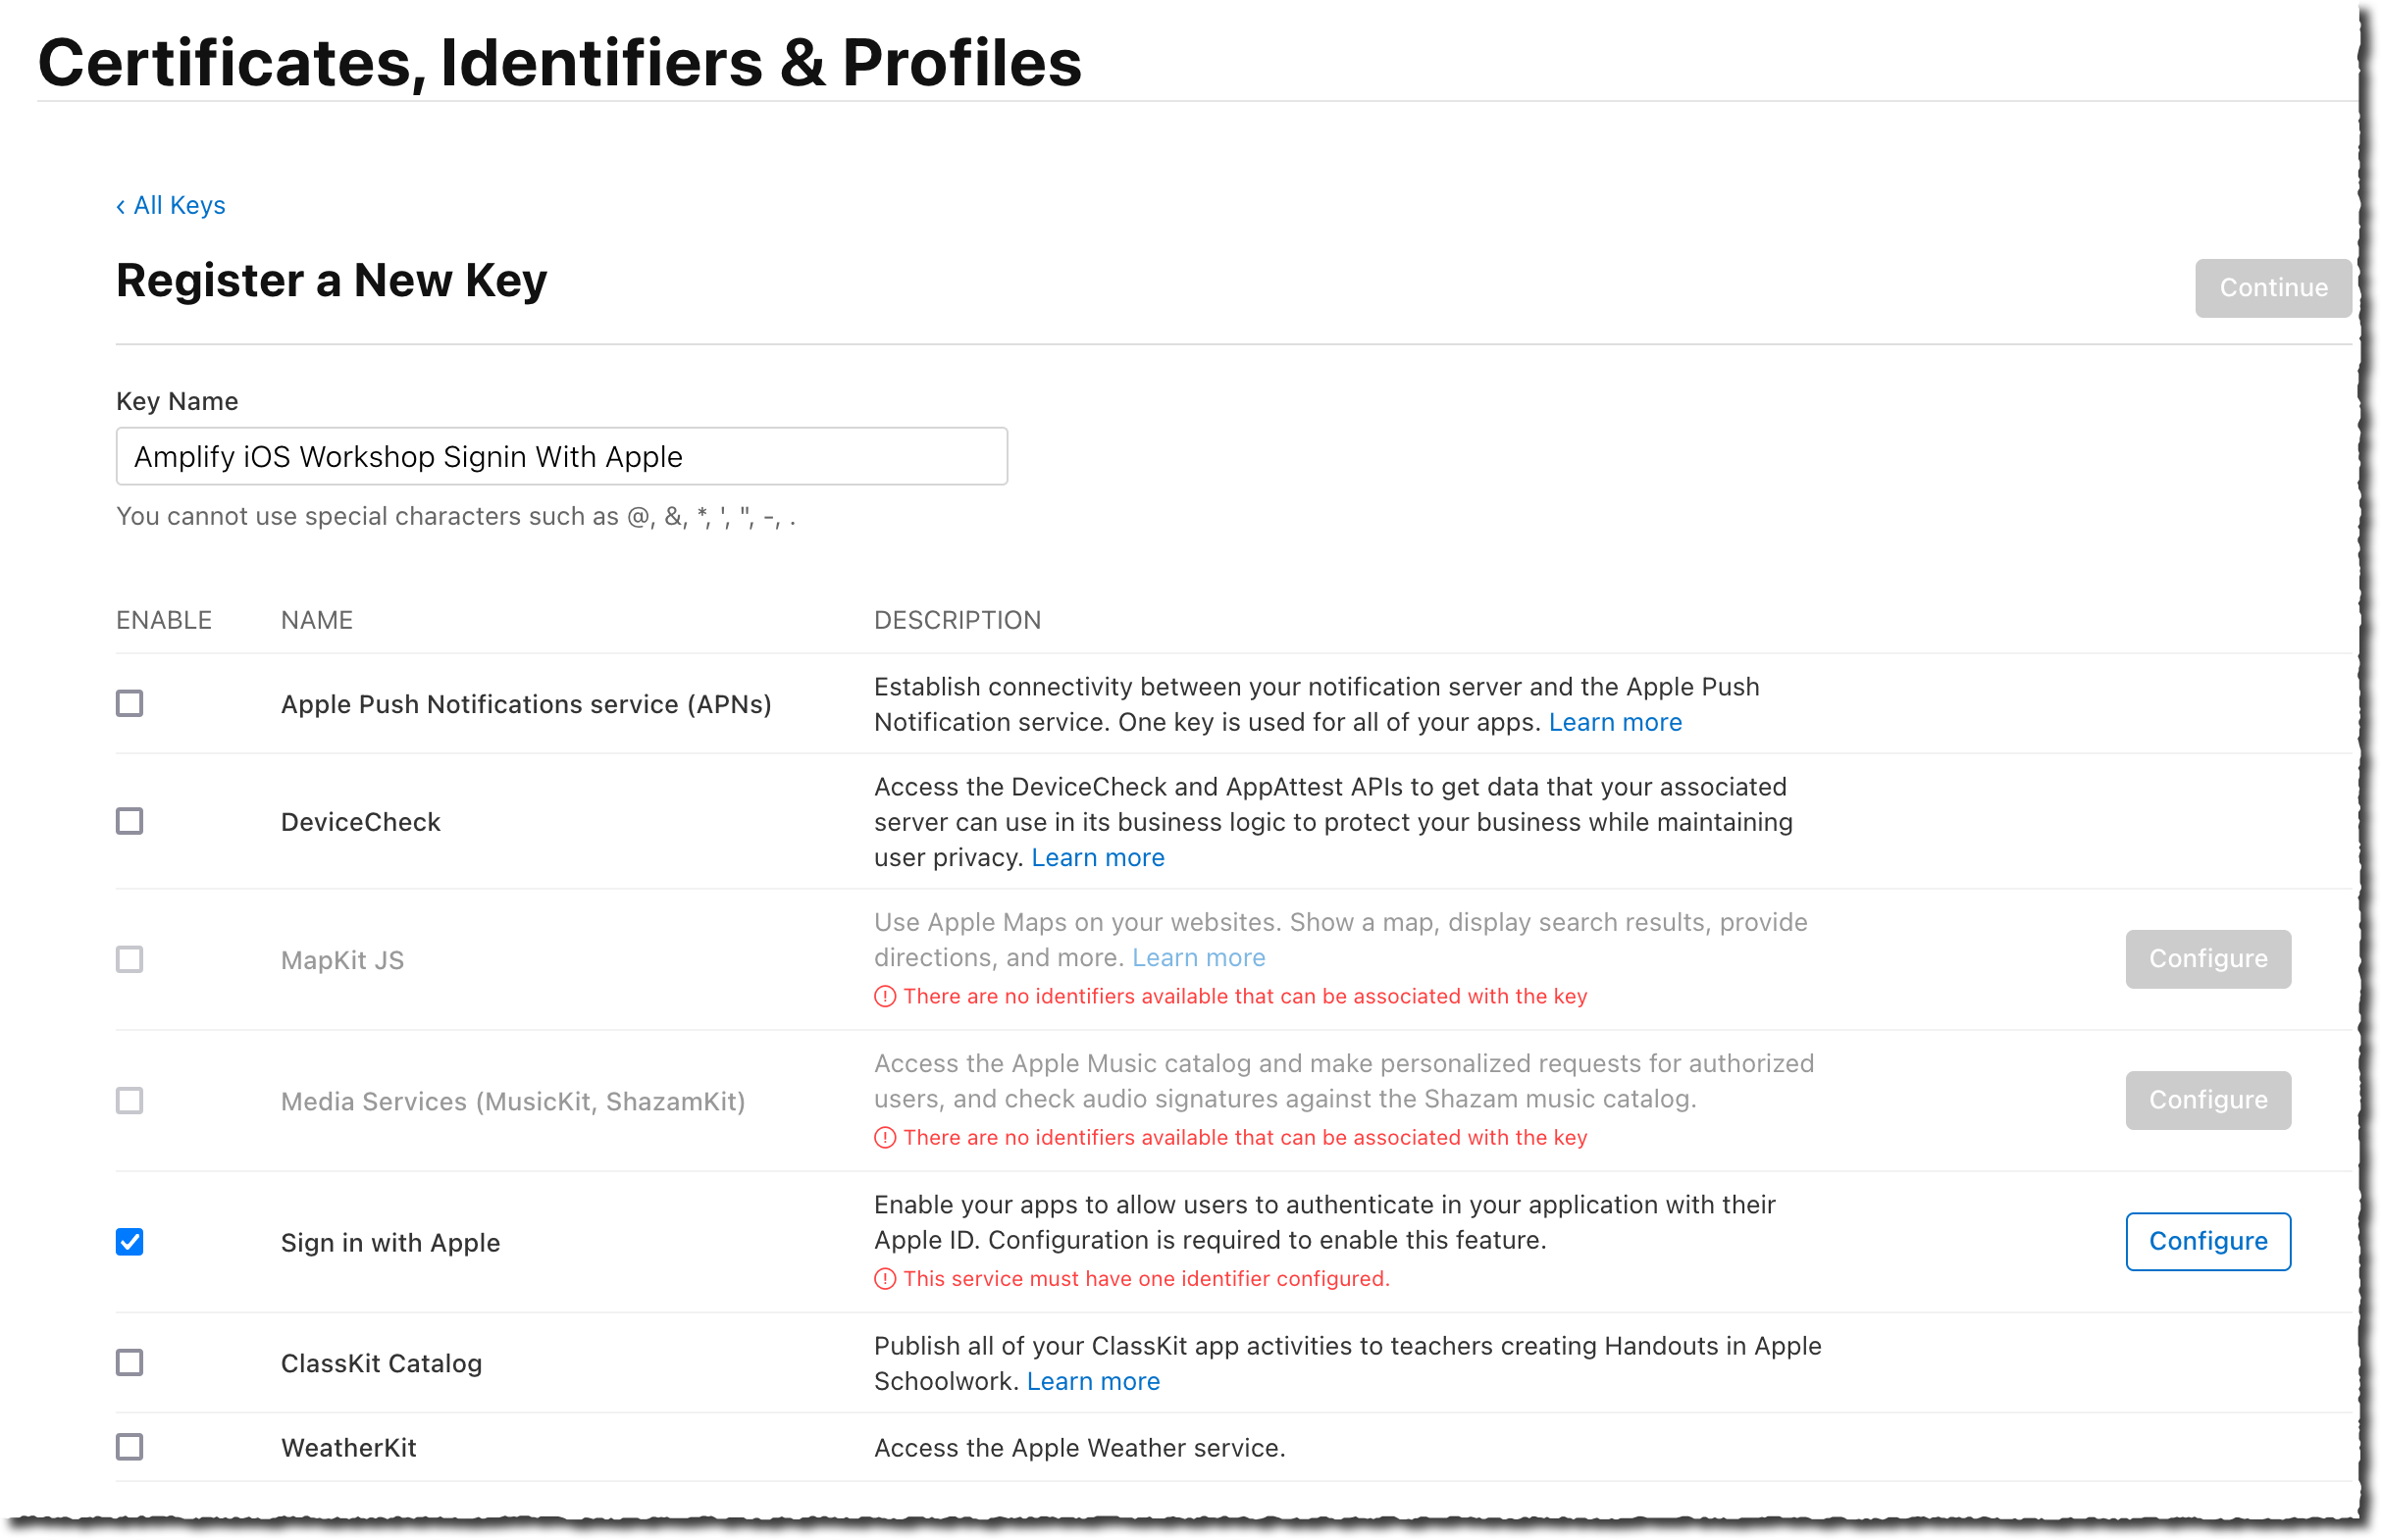
-
On the Register a New Key page, enter a name for that key. I entered Amplify iOS Workshop Sign In Key as Key Name. Make sure Sign in with Apple is selected and select Configure.
- On the Configure Key page, select the Amplify iOS Workshop 2022 as Primary App ID. Then select Save.
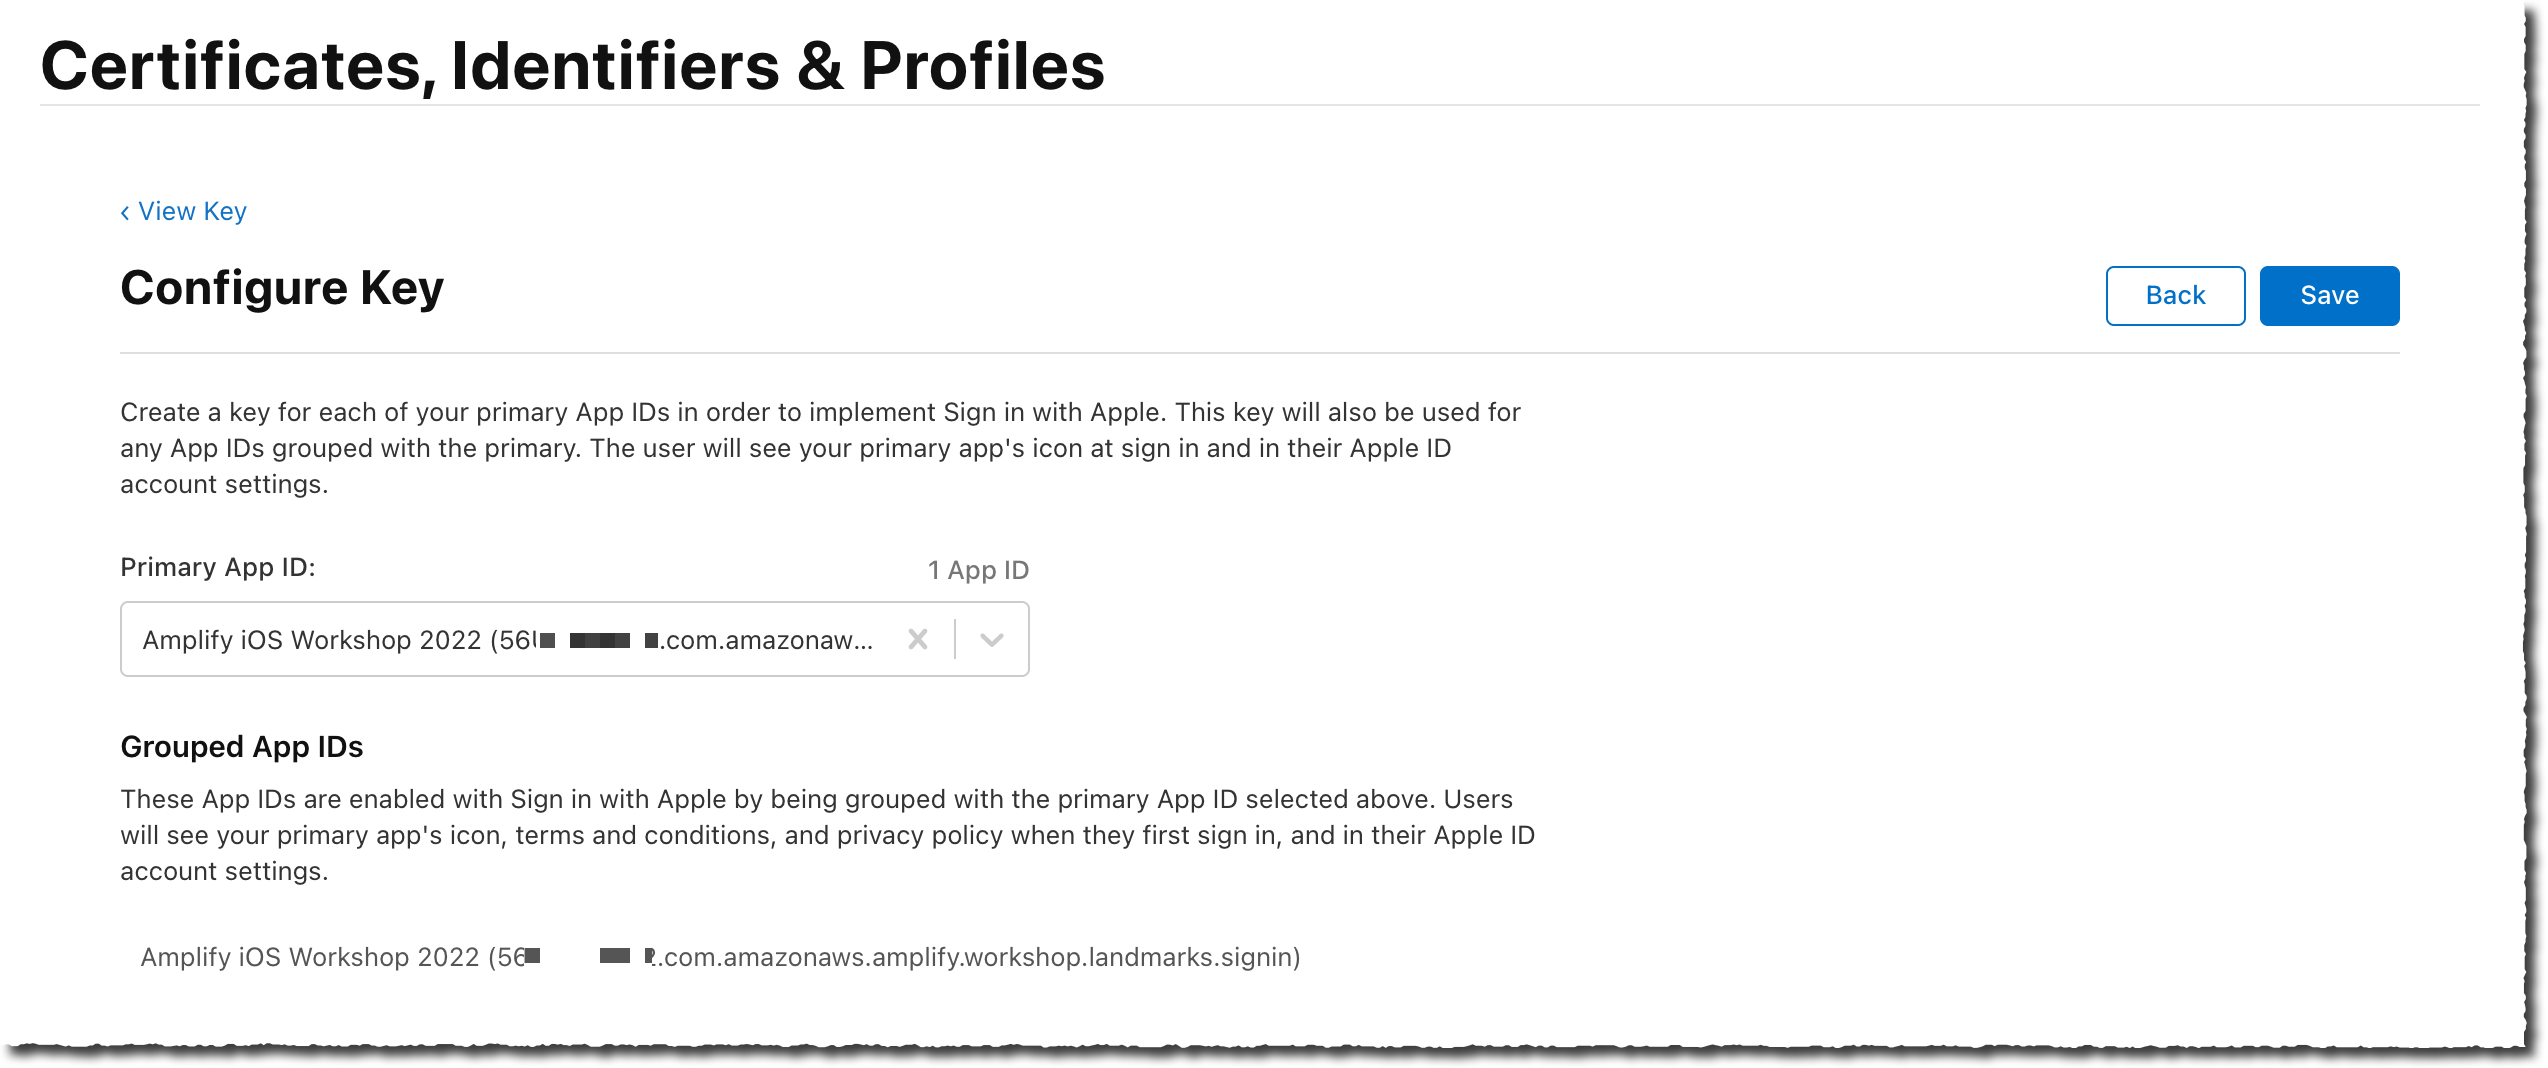
-
On next page, select Continue, then Register to finish creating the key.
-
On the Download Your Key page, select Download to download a
.p8file containing the private key just created.
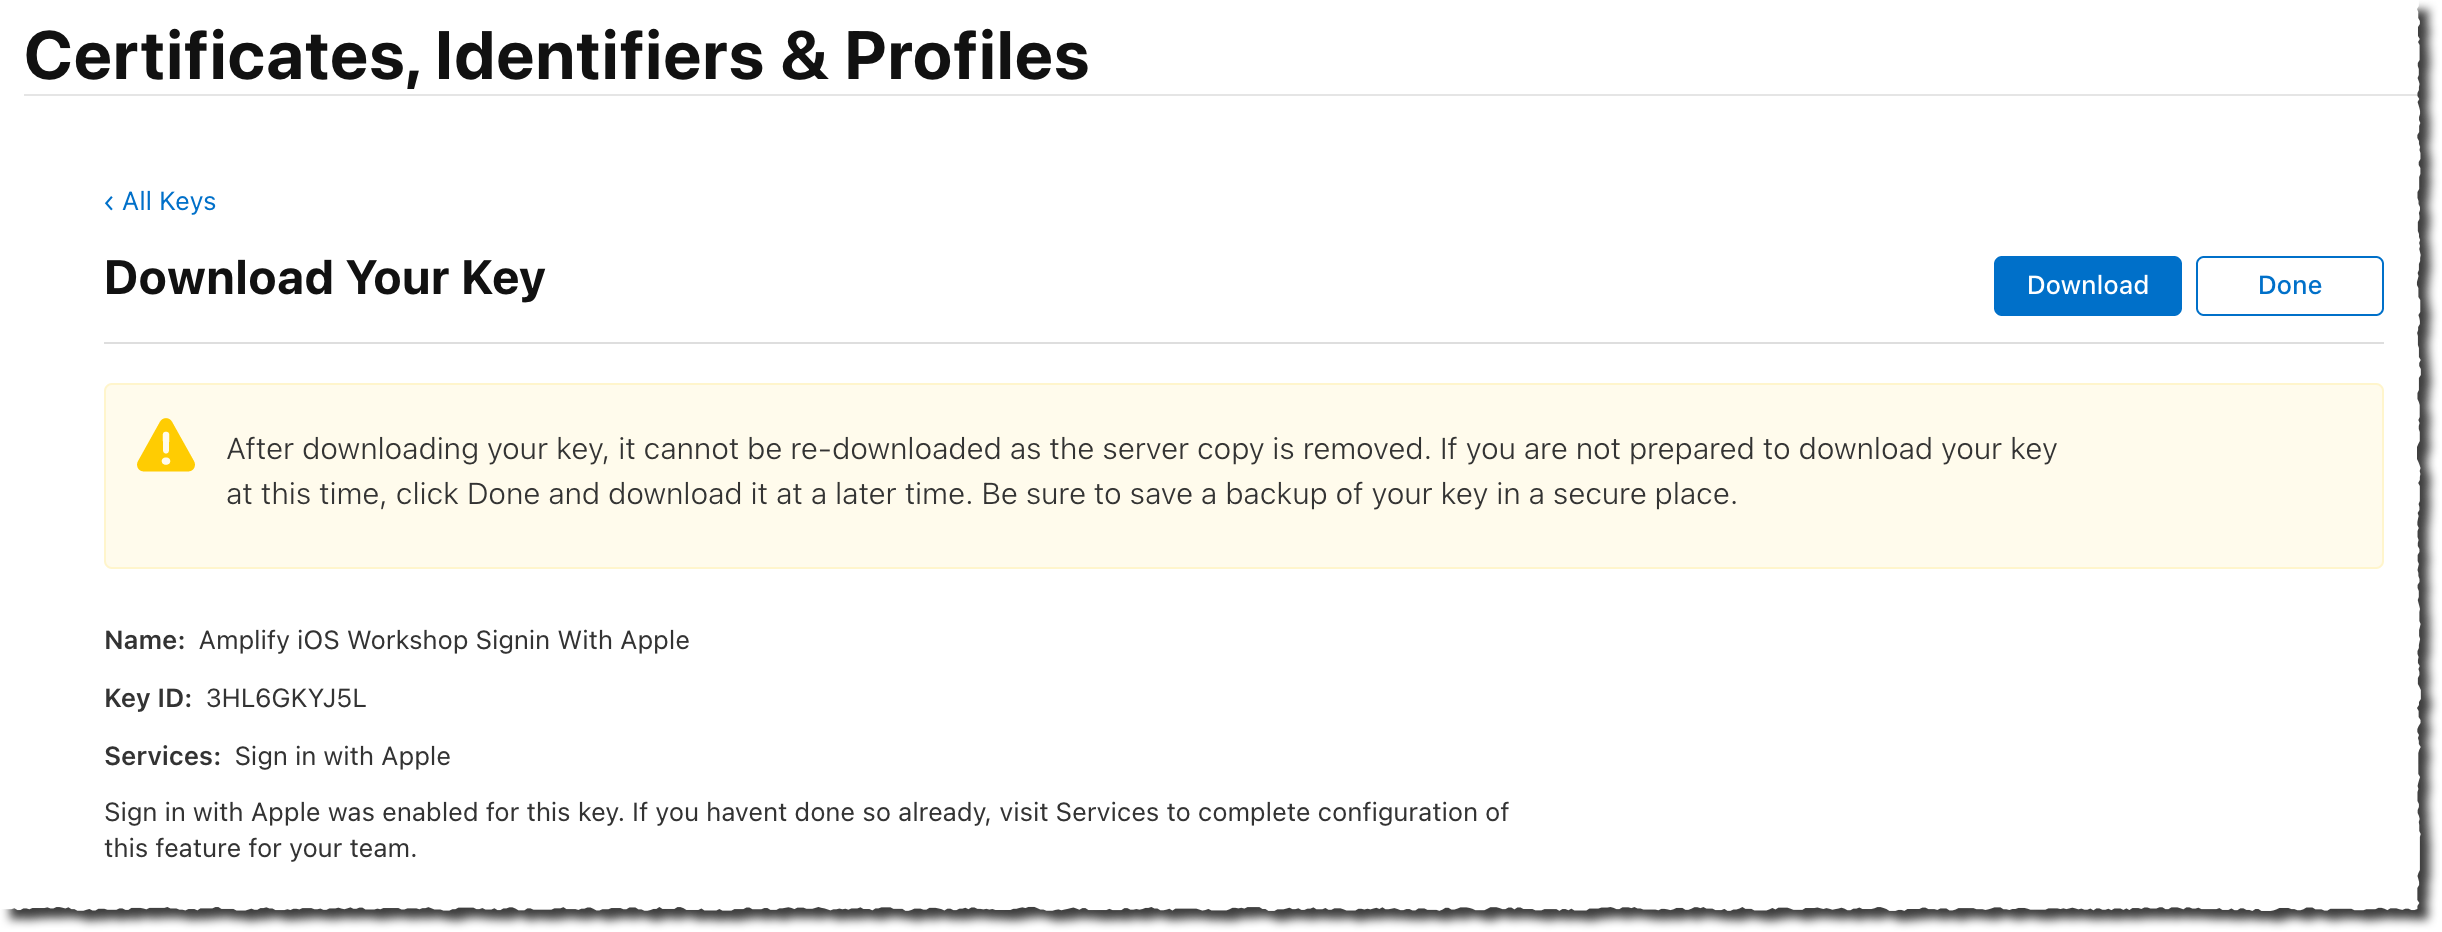
Take a note of the Key ID value and the .p8 private key, as we will pass them to amplify in the next step.
The .p8 file you just downloaded contains a private key in PEM format. This is a multi-line base64 notation. In the next section, Amplify command line will ask for this value as a single-line input.
To convert the .p8 file content to a single line, you may use this bash command and paste the rwsult in the text editor.
cat ~/Downloads/AuthKey_*.p8 | tr -d '\n' | pbcopy
Collect all IDs required by Amplify
At the end of this section, you must have kept four values to pass to Amplify command line. The values I collected from the above example are :
- the Service ID (the one finishing with
.signin) :com.yourcompany.amplify.workshop.landmarks.signin - the Team ID :
56****** - the Key ID :
3HL6GKYJ5L - the private key in one single line PEM format :
-----BEGIN PRIVATE KEY-----MIG...(redacted)...gty6P-----END PRIVATE KEY-----
The values will be different for you.
Next step is to update AWS Amplify’s configuration to include Sign in with Apple.