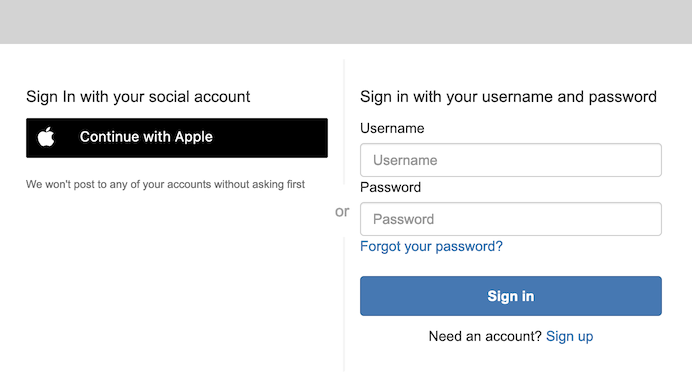
Federation with Hosted UI
The easiest way to present users a GUI that includes identity federation is to use Cognito Hosted UI. Cognito Hosted UI automatically adds “Continue With XXX” button based on the backend configuration.
You can test the Hosted UI by clicking on the link given by Amplify CLI at the end of the amplify push command from previous section. For example, my link is:
https://amplifyiosworkshopaf0xxxxx-xxxxxxxx-dev.auth.eu-west-1.amazoncognito.com/login?response_type=code&client_id=58xxxxxxxxxxxxxxjhn&redirect_uri=landmarks://
The Hosted UI now shows the “Continue With Apple” button.
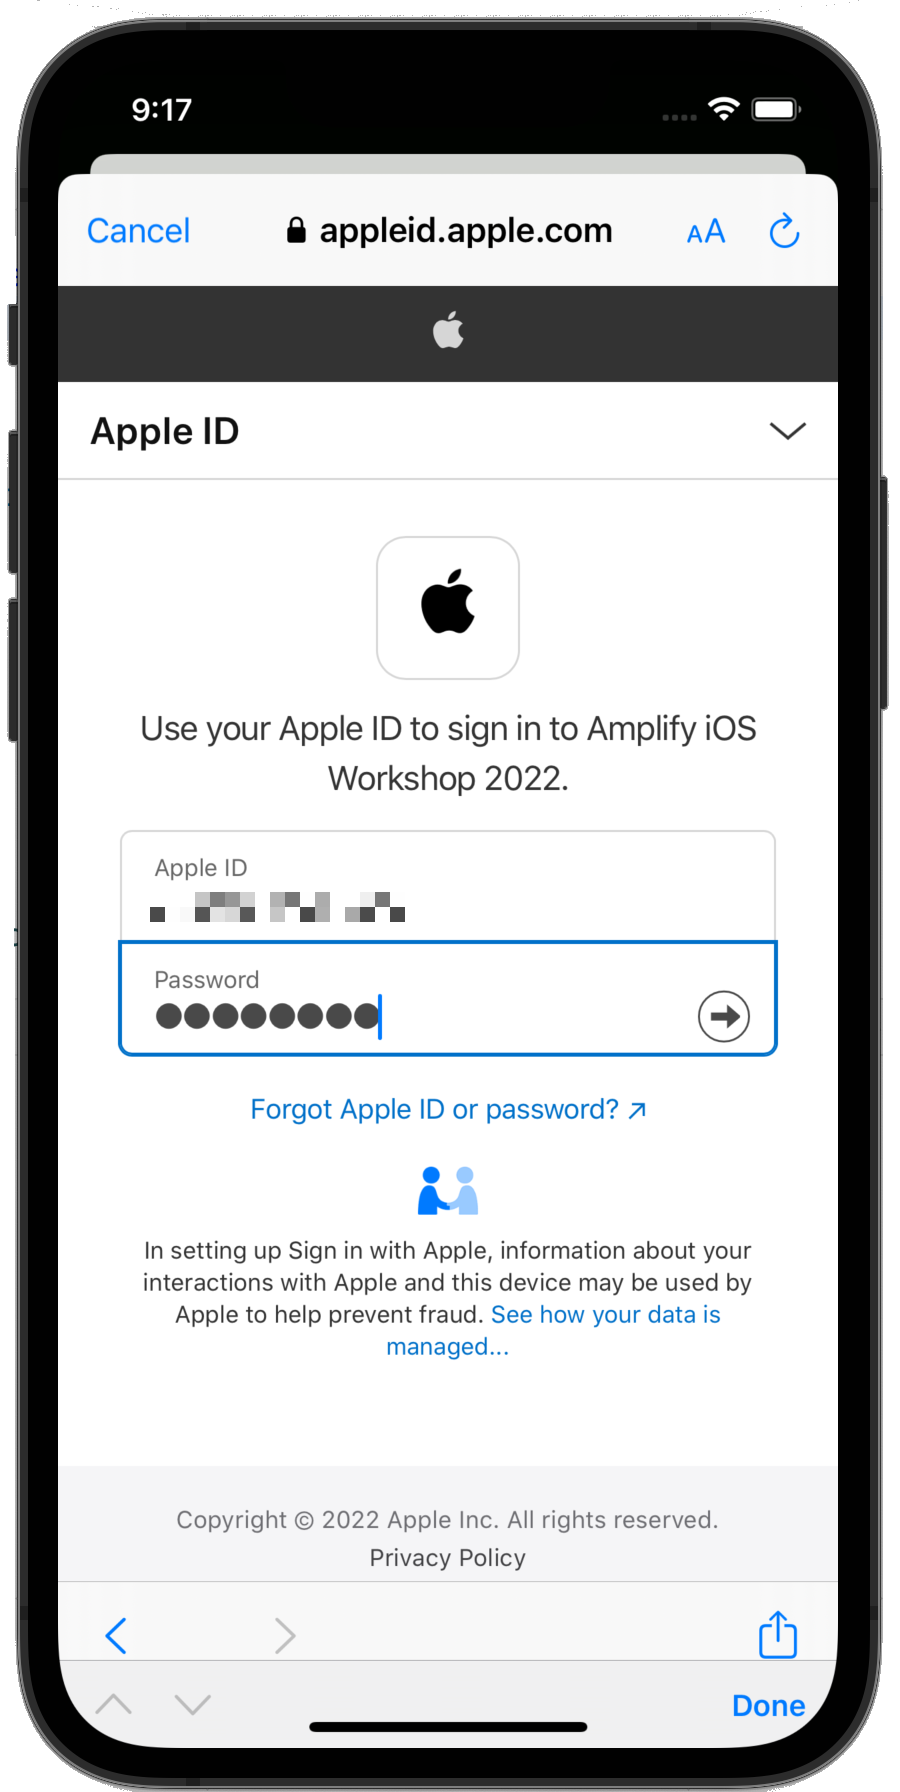
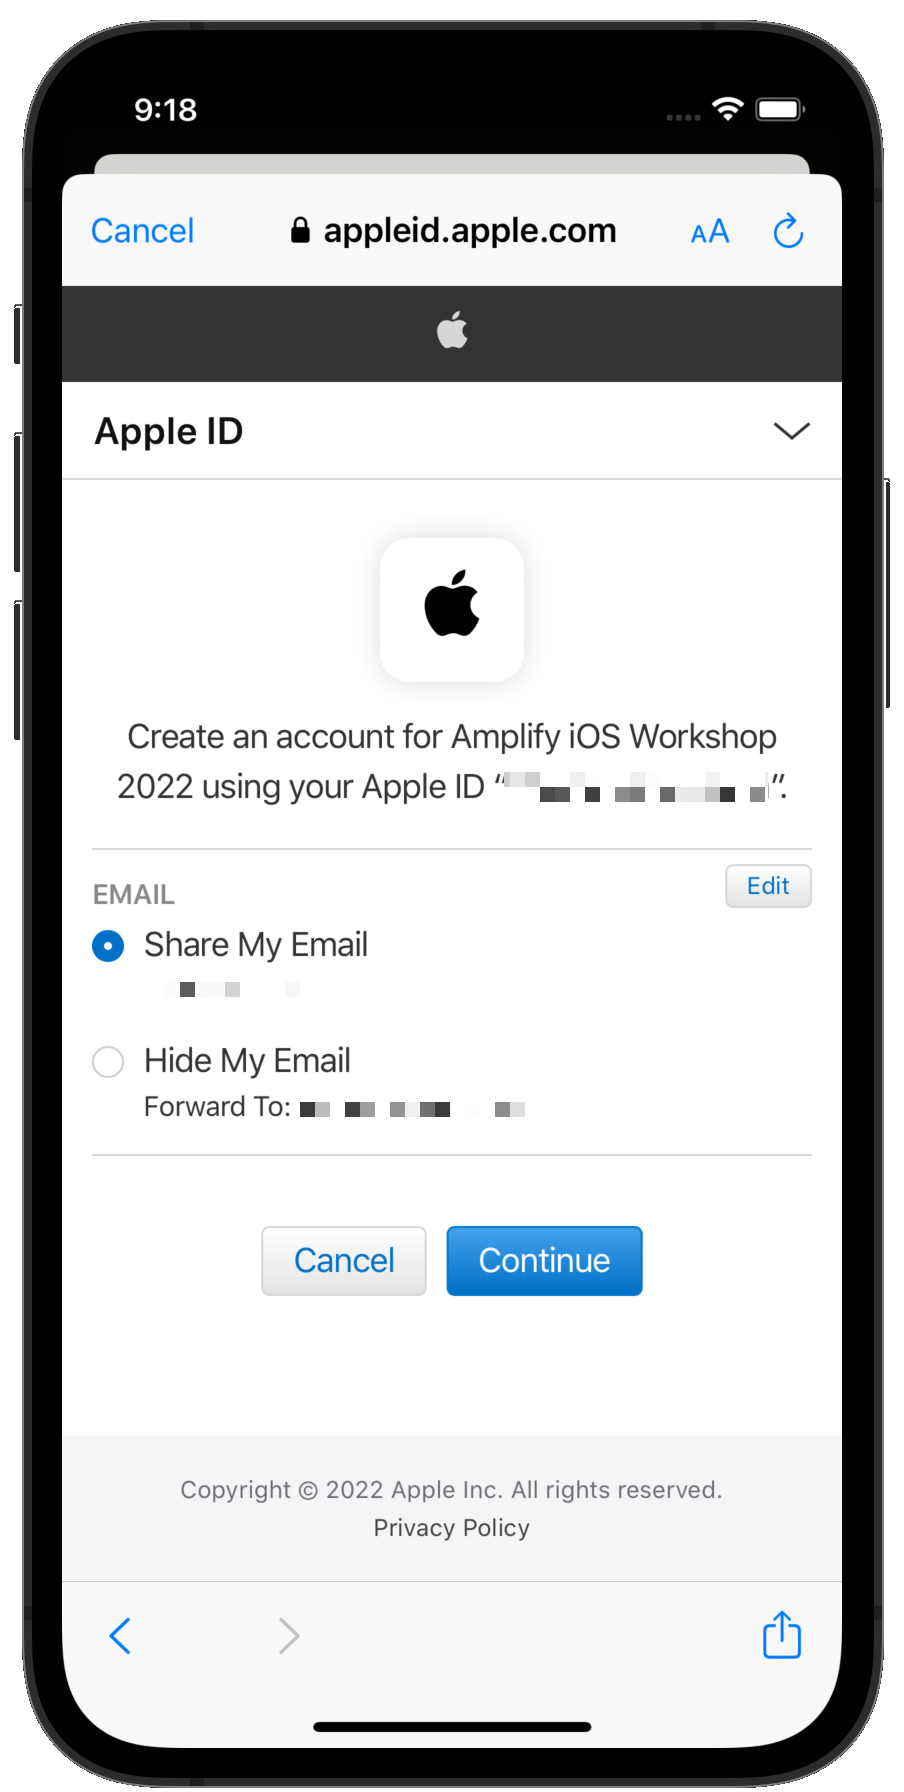
If you try to authenticate using Sign in with Apple using the above URI from a browser, you will be directed to Apple Sign in page and be able to enter your email address and password. However the process will not terminate completly as the redirect_uri in the URL is an iOS-only URI that we gave for our app (landmarks://) The final redirection will only work in our mobile app.
There is no code change to make this happen in the iOS app, as it using the Cognito hosted web UI too.
Build and Test
Build and launch the application to verify everything is working as expected. Click the build icon or press ⌘R.
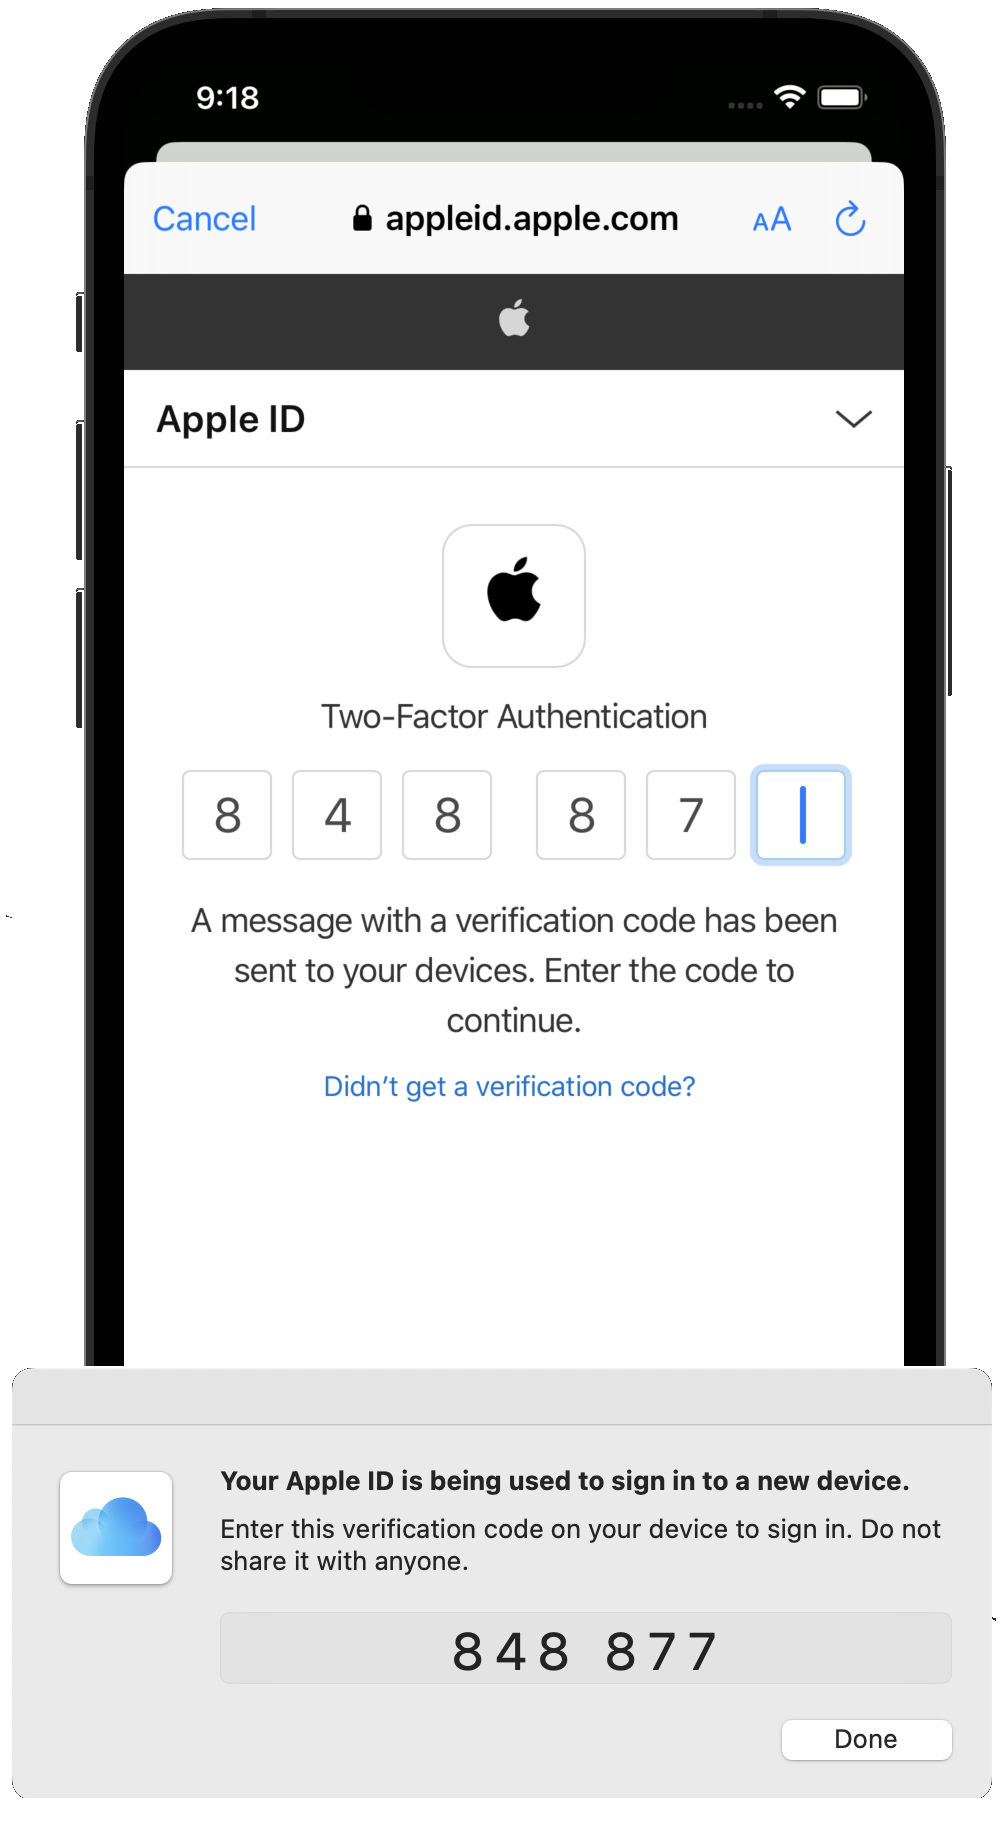
If you are still authenticated, click Sign Out and click the user badge to sign in again. You should see the Amazon Cognito hosted UI. Click Continue With Apple, follow the Apple login process, including multi-factor authentication and email settings and, eventually, you should see the Landmark list.
At this stage, no code change is required if you decide to add other identity providers to your backend configuration. The Hosted UI will automatically propose “Login with XXX” buttons based on the providers configured on the backend. All the interactions between the identity provider and Cognito happen on the backend, no client code is involved.
| Hosted UI | Sign in sequence | MFA |
|---|---|---|
 |
 |
 |
| Trust Browser | Email Config | App launched |
 |
 |
 |
Checking Amazon Cognito Identities
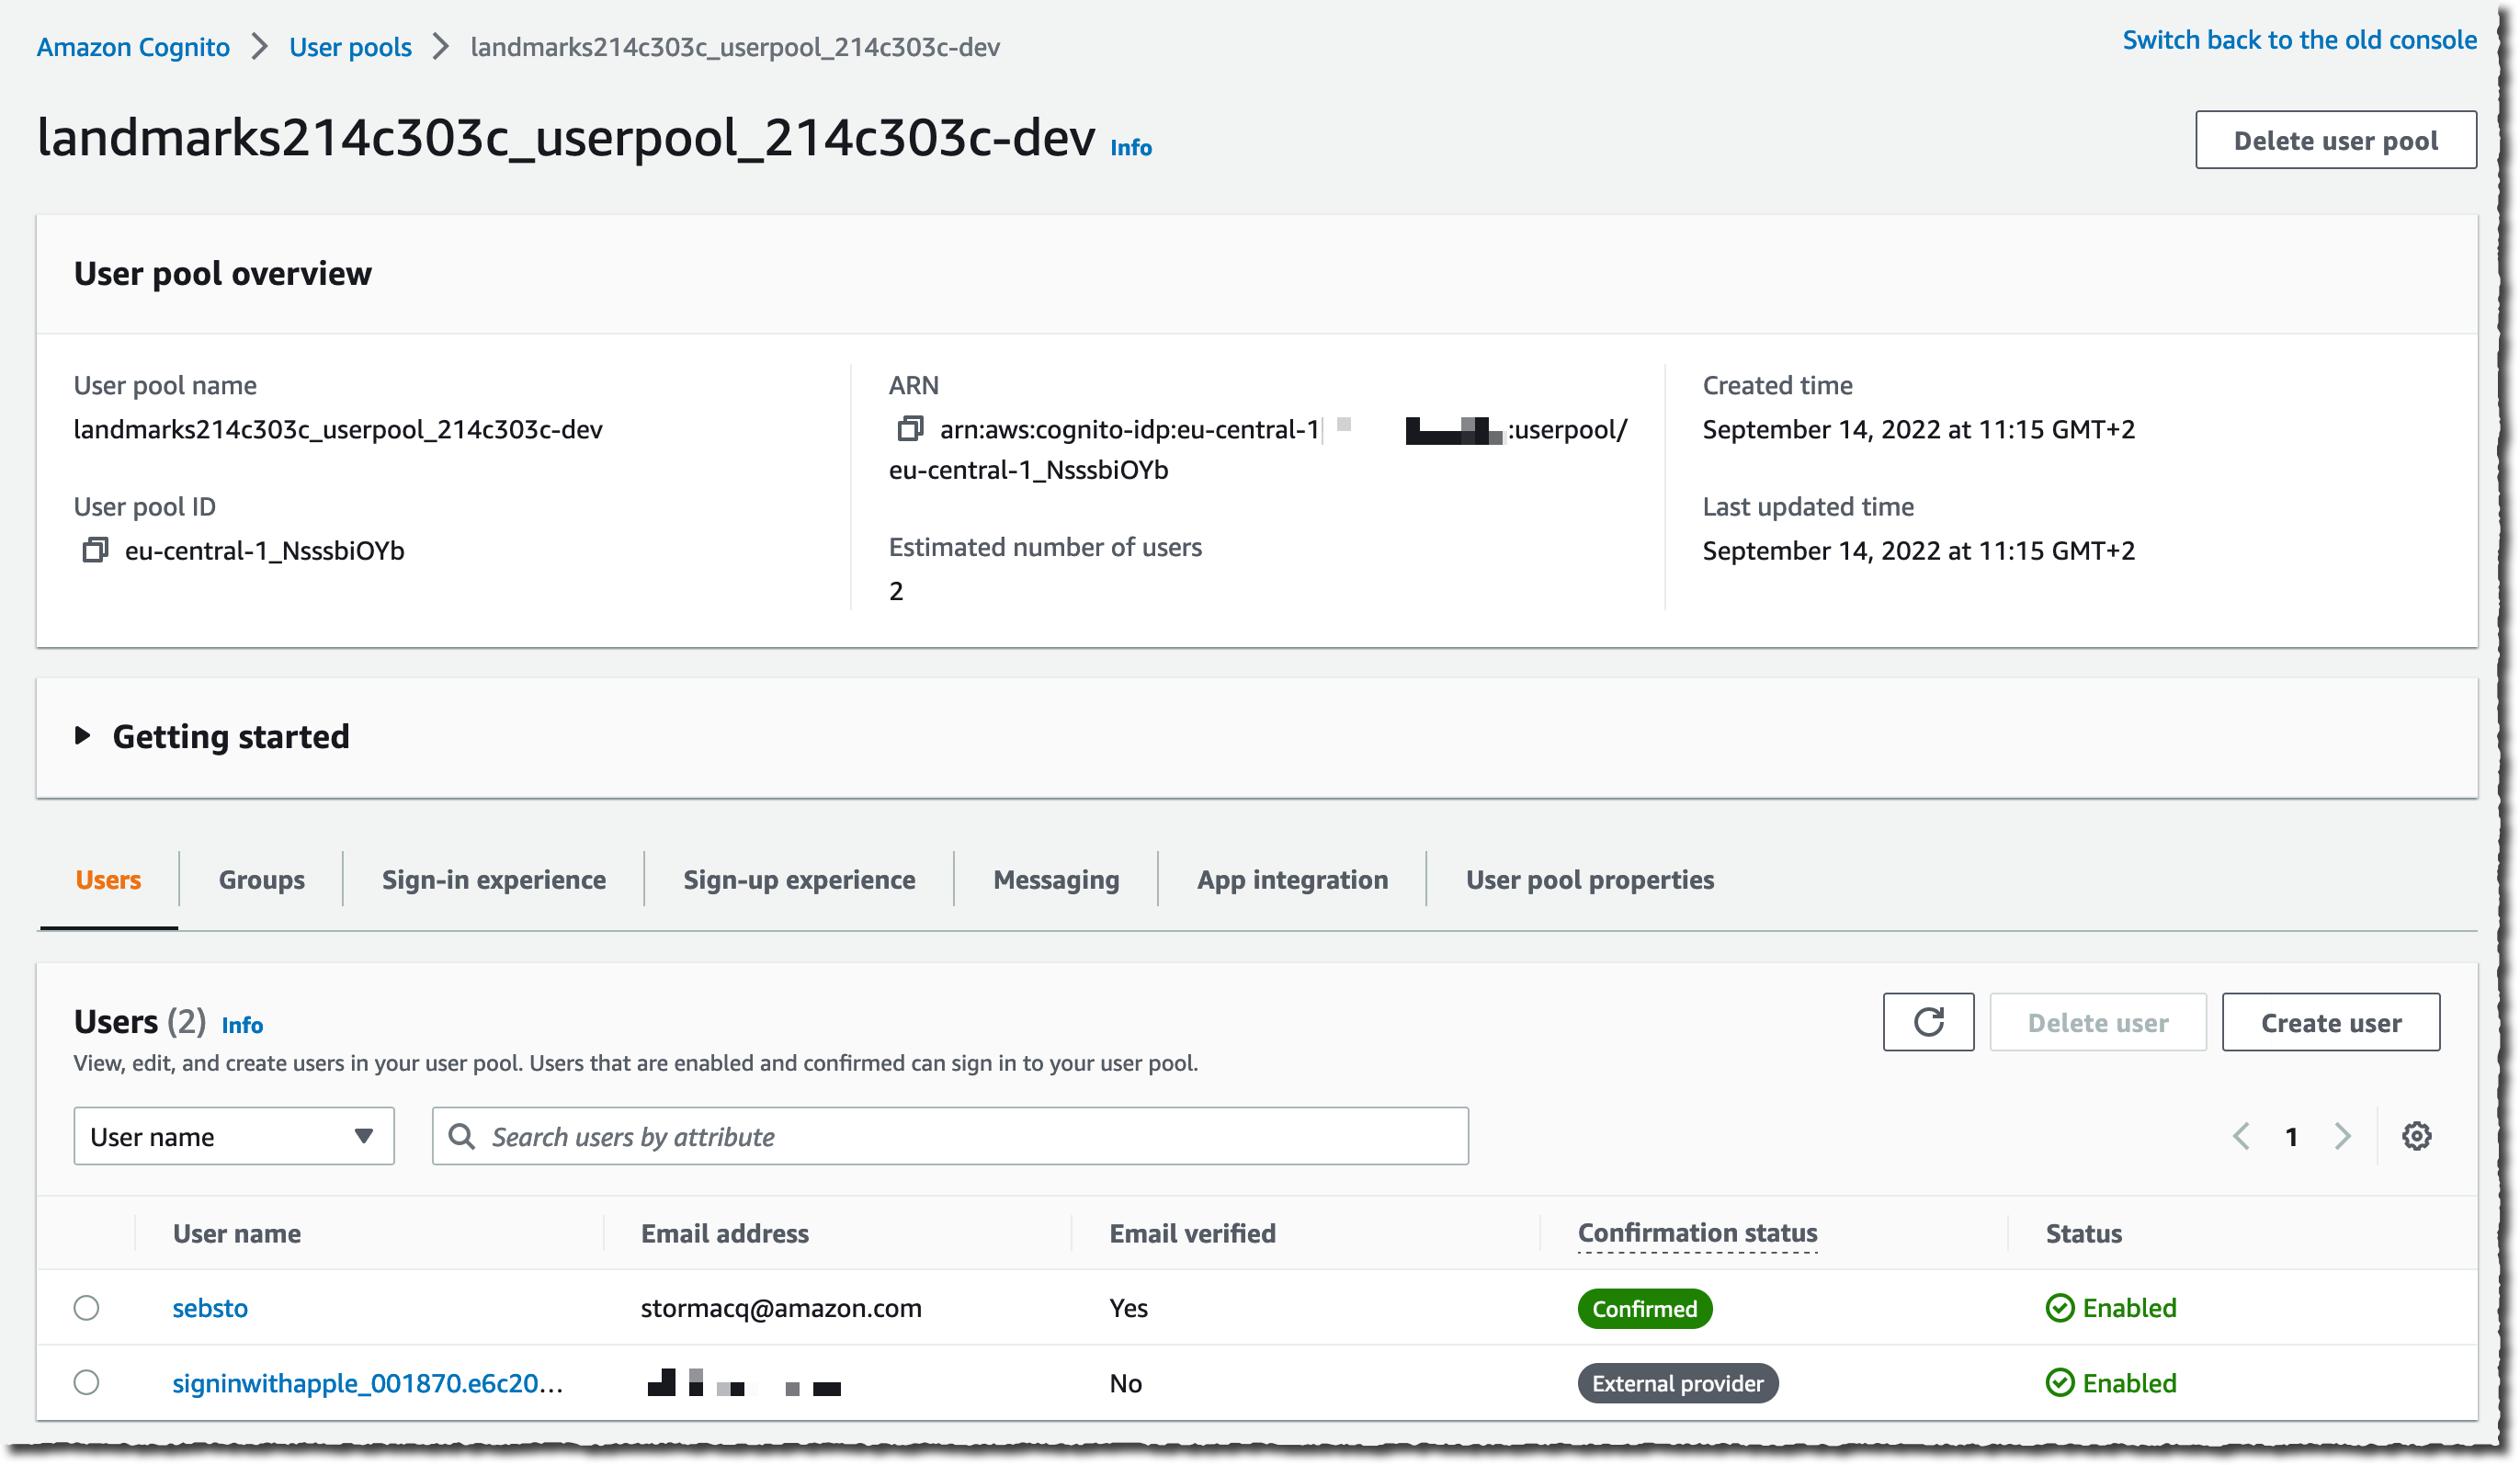
By choosing Continue with Apple, you actually created a second identity to represent you in your backend. As seen from Amazon Cognito, the user you created earlier and the Apple federated user are two different identities. You can connect to Amazon Cognito console, click on the user pool name (amplifyiosworkshopxxxxx), select the Users tab to verify two identities have been created:
Congrats! 🎉 You just added Sign in with Apple to your app, without changing a single line of code.