Update Amplify
Amazon Cognito does support Identity Federation out of the box with Login With Amazon, Login with Google, Login with Facebook, Sign in with Apple, or any OIDC or SAMLv2 compliant identity provider.
We use AWS Amplify command line to update the Amazon Cognito configuration on the backend and add support for Sign In with Apple.
There are four values to be collected from previous step. Be sure you have it all in a text editor before starting this section
In a terminal, type:
cd $PROJECT_DIRECTORY
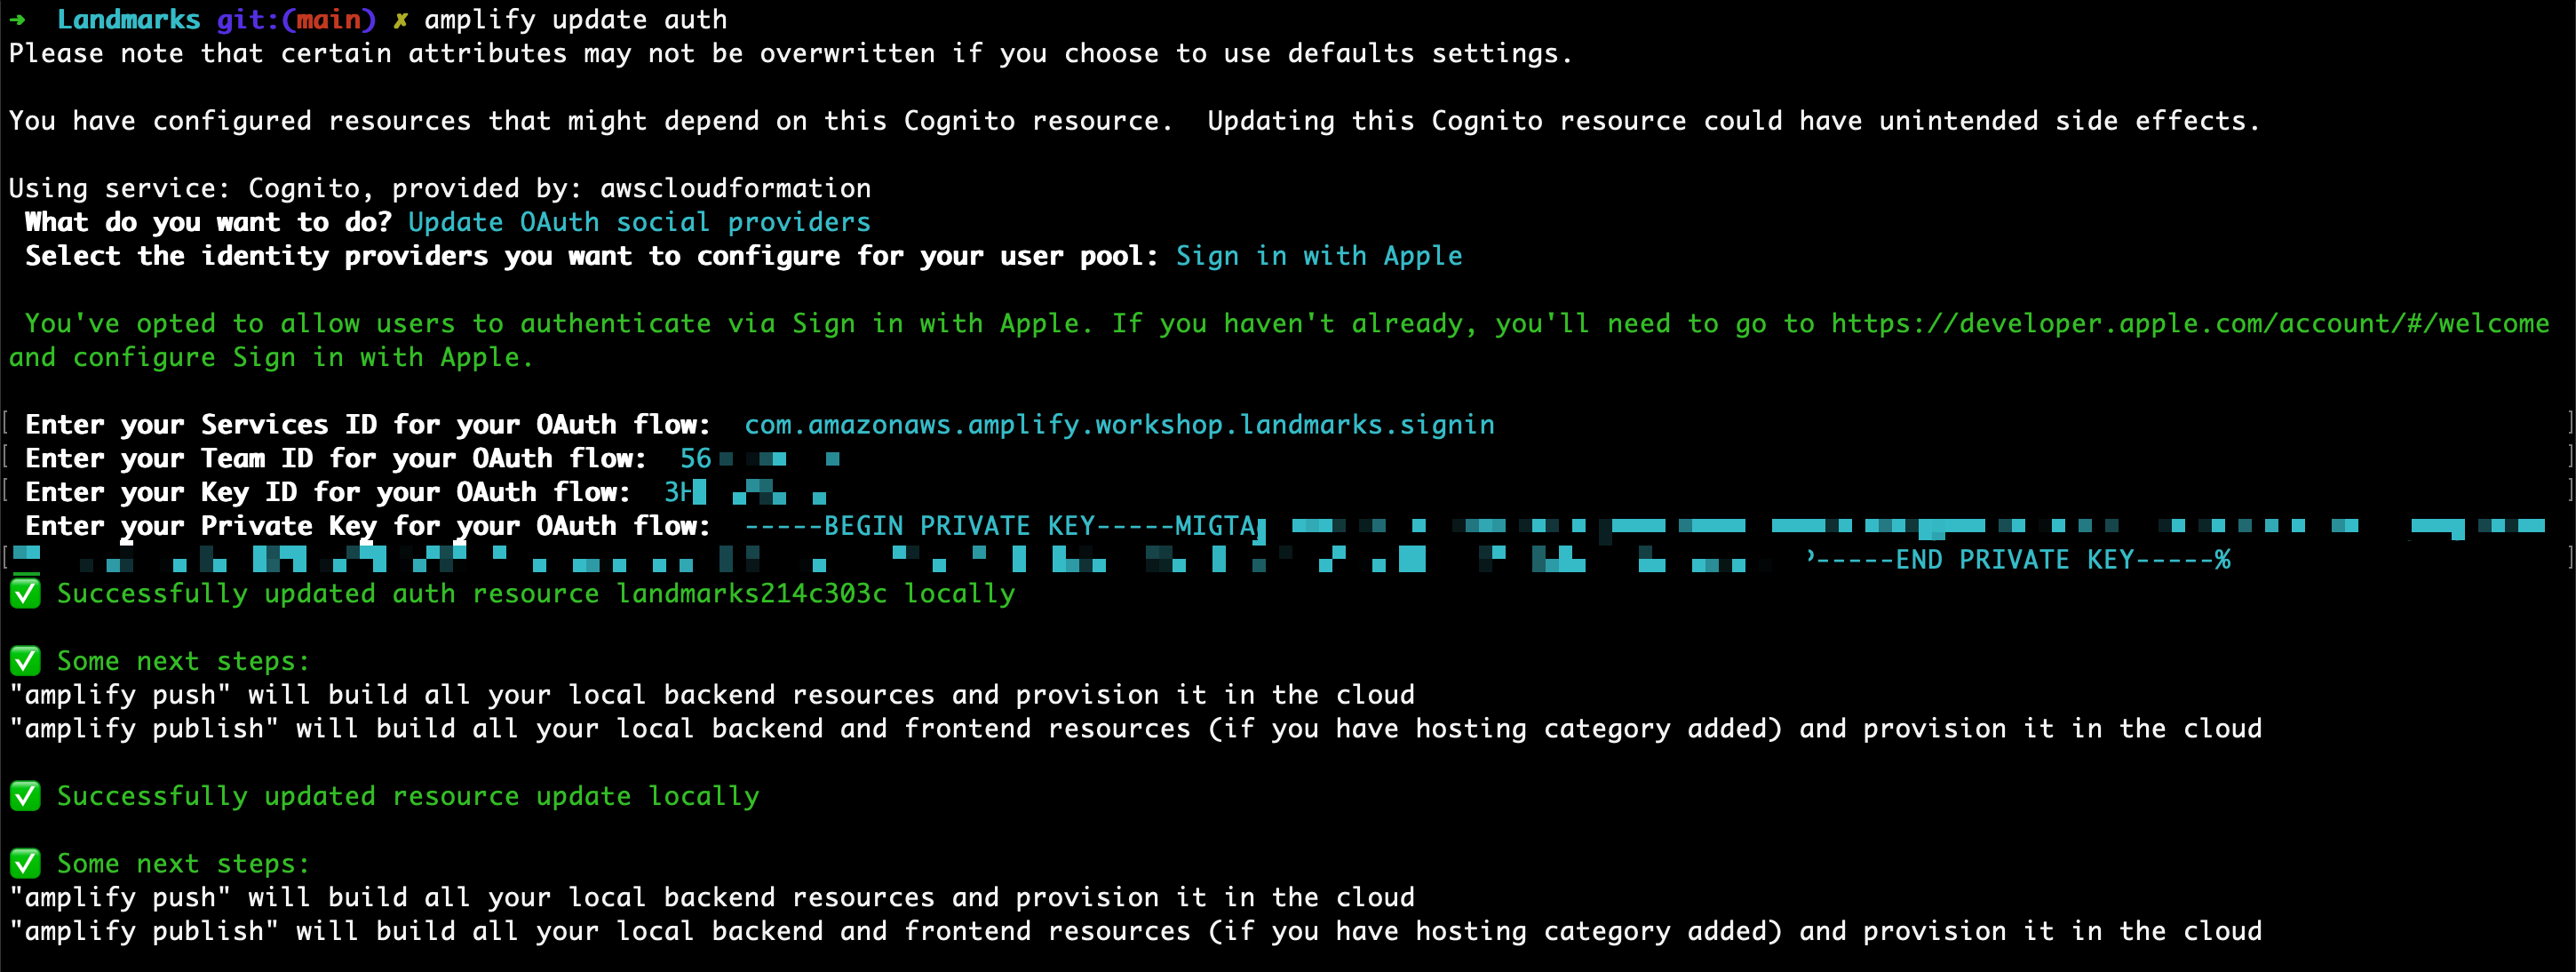
amplify update auth
-
What do you want to do? Choose Update OAuth social providers and press enter
-
Select the identity providers you want to configure for your user pool: Use the arrow keys to highlight Sign in with Apple and press space, then press enter.
-
Enter your Services ID for your OAuth flow. Type your Service ID and press enter (in my example
com.amazonaws.amplify.workshop.landmarks.signin). -
Enter your Team ID for your OAuth flow: Type your Team ID and press enter (in my example
56********). -
Enter your Key ID for your OAuth flow: Type your Key ID and press enter (in my example
3HL6GKYJ5L) -
Enter your Private Key for your OAuth flow: Type your private key as a one-line PEM format (in my example
-----BEGIN PRIVATE KEY-----MIG (redacted) y6P-----END PRIVATE KEY-----)
amplify creates the required resources to deploy the Sign in with Apple configuration in the cloud.

Create the API backend in the cloud
In a Terminal, assuming you are still in your project directory, type:
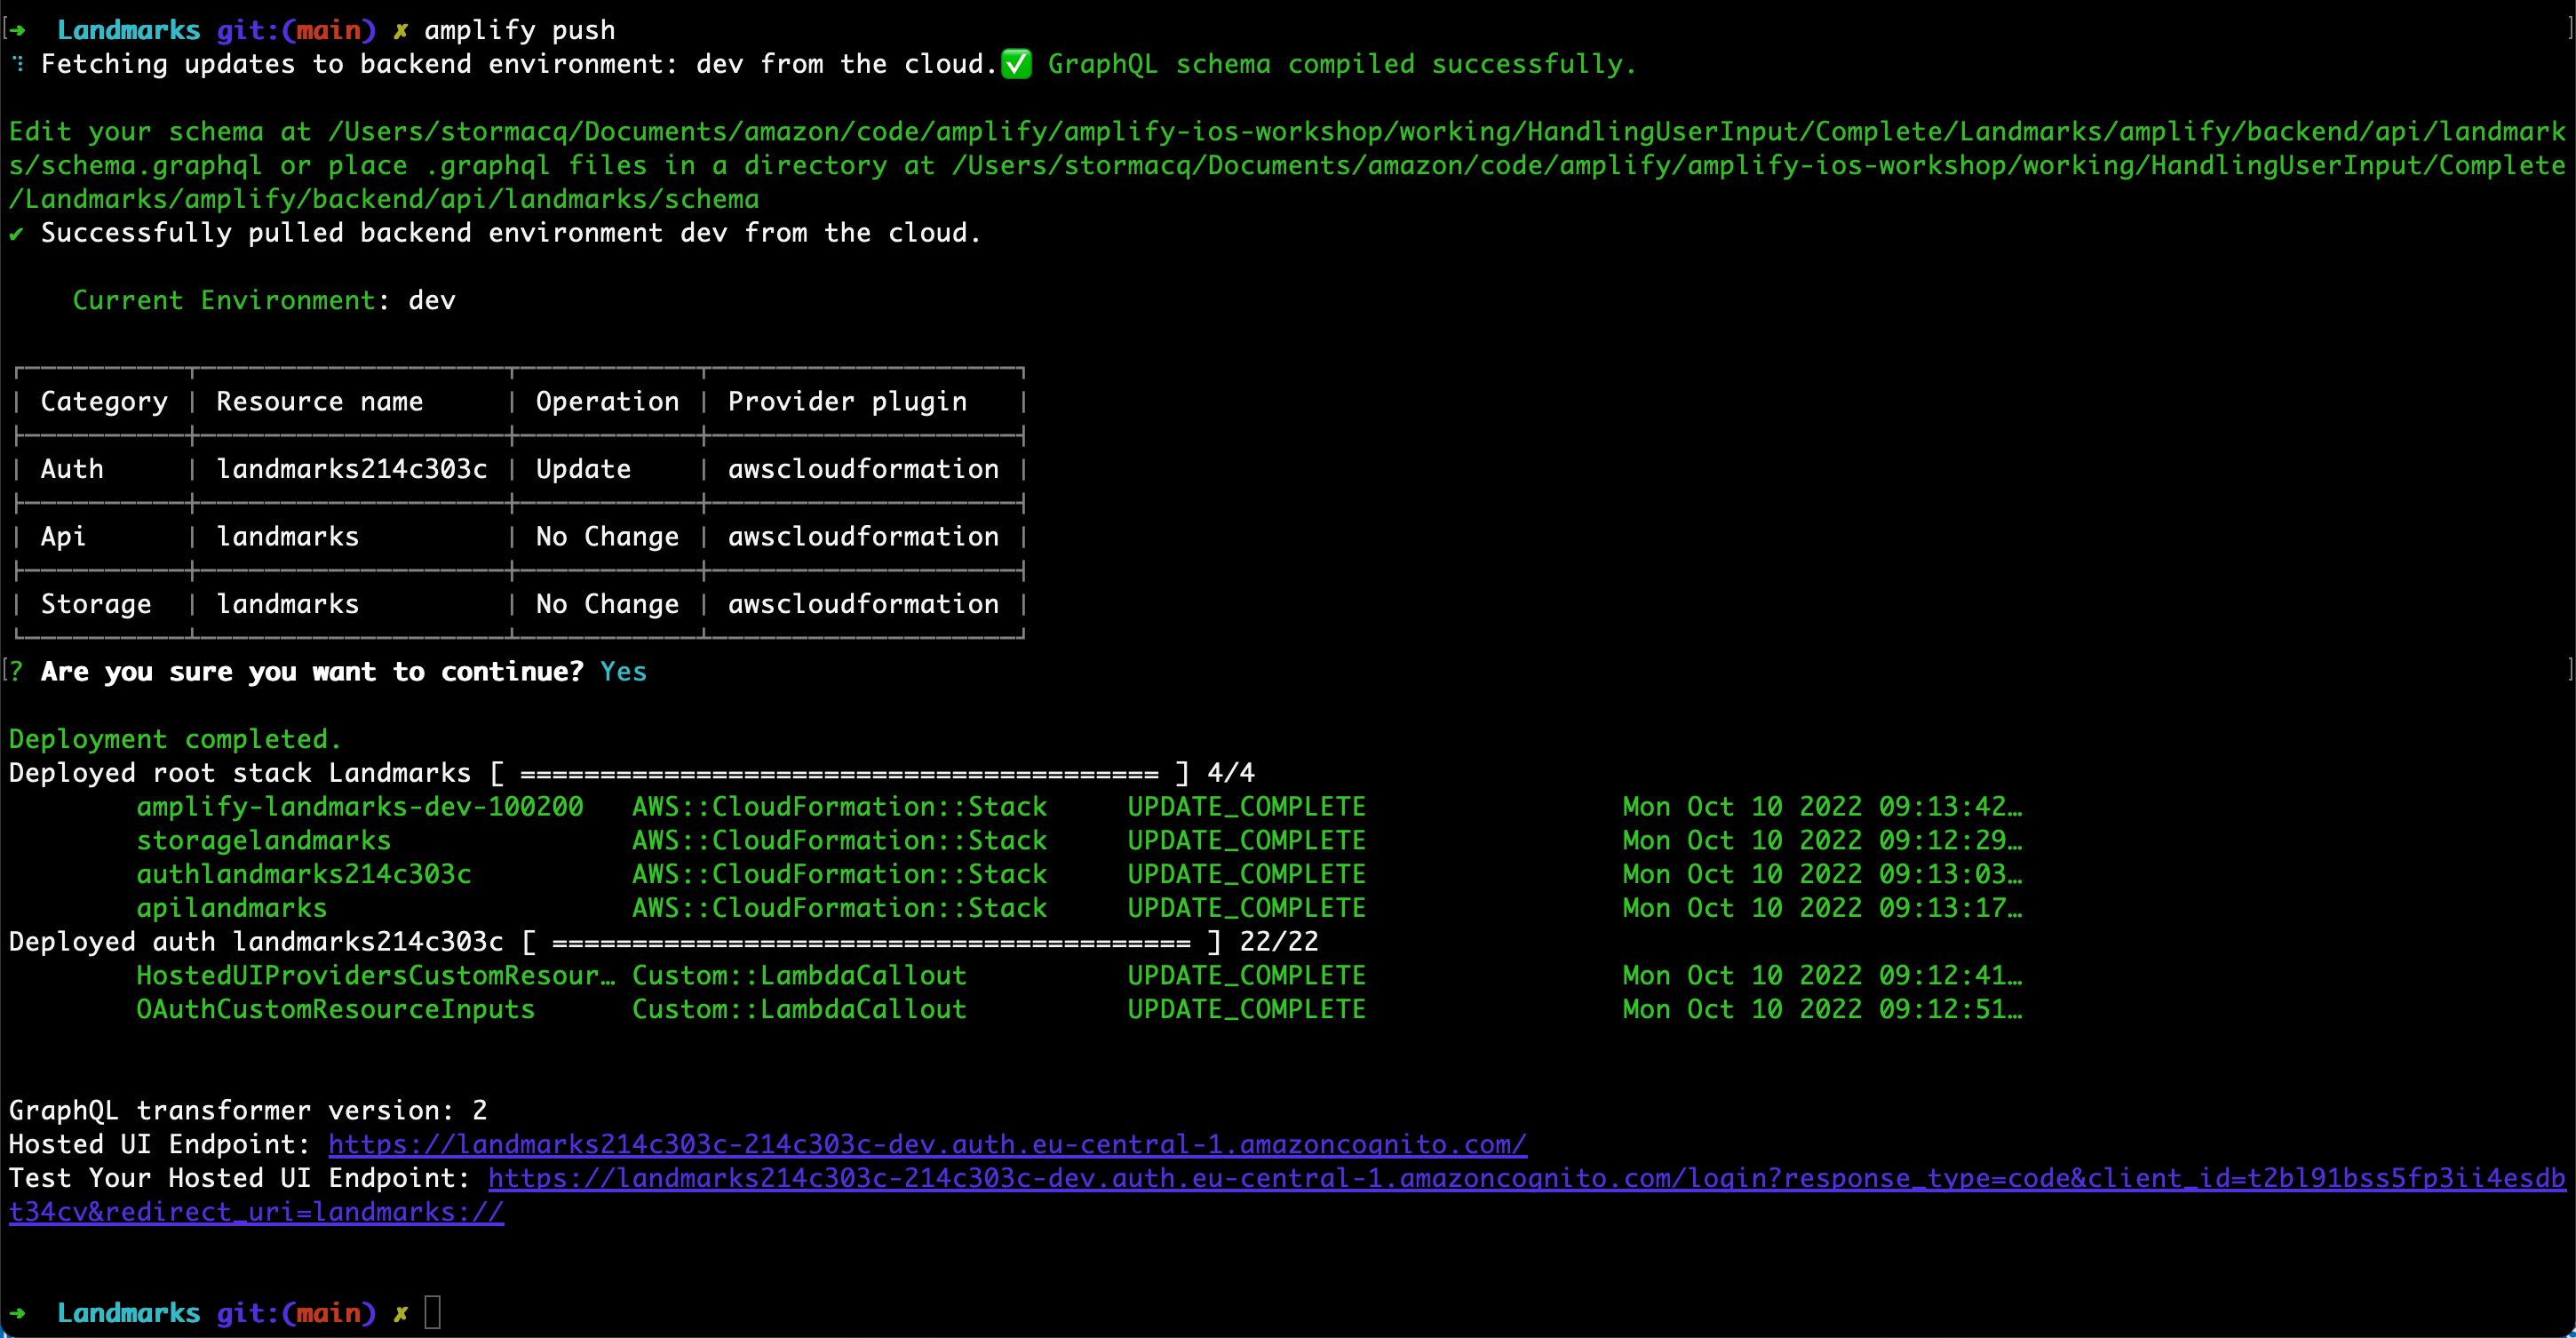
amplify push
- Are you sure you want to continue? Review the table and verify the Auth service is being Updated. Accept the default (Yes) and press enter.
Amplify updates the backend infrastructure, it adds the federation configuration to Amazon Cognito. After a while, you should see the familiar message :
Deployment completed.

That’s it ! There is no change required in the code. The federation happens between Cognito and Apple on the server side. We can start our app and start to test immediately.